Infrared
My journey into digital infrared photography
Since becoming interested in film photography, and watching the film Beasts of No Nation, I became intrigued with infrared photography, seeing beyond the visible.
I had followed the work of a popular film photography YouTuber for a while, Grainydays, and he had an obsession with the ever expensive discontinued film stock aerochrome. Aerochrome was unique, it wasn’t just an infrared film, but a colour infrared film.
Discontinued in 2009, aerochrome was sensitive to near-infrared, perfect for reflected infrared light provided by plants due to the Wood effect. Contracted by the US Military, Kodak originally made aerochrome for sensing plant health, but it was soon adopted to find camouflaged bases and other military installations in forested areas.

Unlike modern infrared films, such as Ilford SFX and Rollei Infrared, Aerochrome uses a colour base, specifically, a colour positive base. Reds, pink, and brown tones are left where near infrared light would be, and visible reds shift green or yellow, greens turn purple or blue. Sky and water goes dark, and skin tones may go a sickly yellow.
Aerochrome wasn’t just for the military however, as technology changed, it ended up in the hands of consumers. It was used to photograph Jimi Hendrix’s “Are you Experienced” album cover, various other album covers, and just generally used as an alternative, artistic look.
That was, until it was used by Richard Mosse for his work “Infra”. Infra covered the war in the Democratic Republic of the Congo, focusing on the landscape and the juxtaposition of soldiers, many children. This would go on to inspire a part of the film mentioned above, "Beasts of No Nation”.
I wanted to use infrared in my A Level photography component 1, specifically inspired by the works of Mosse and a Zak van Bijon, however, I could never fit it in.
In early 2025 however, I made the specific commitment to shoot some infrared for component 2. I couldn’t shoot colour infrared however, aerochrome can easily be found for over £350 a roll, and my project was in black and white. Since my main film camera was loaded with black and white films, and I still needed my main camera, a ‘sacrificial’ camera was need for infrared.
Conversion
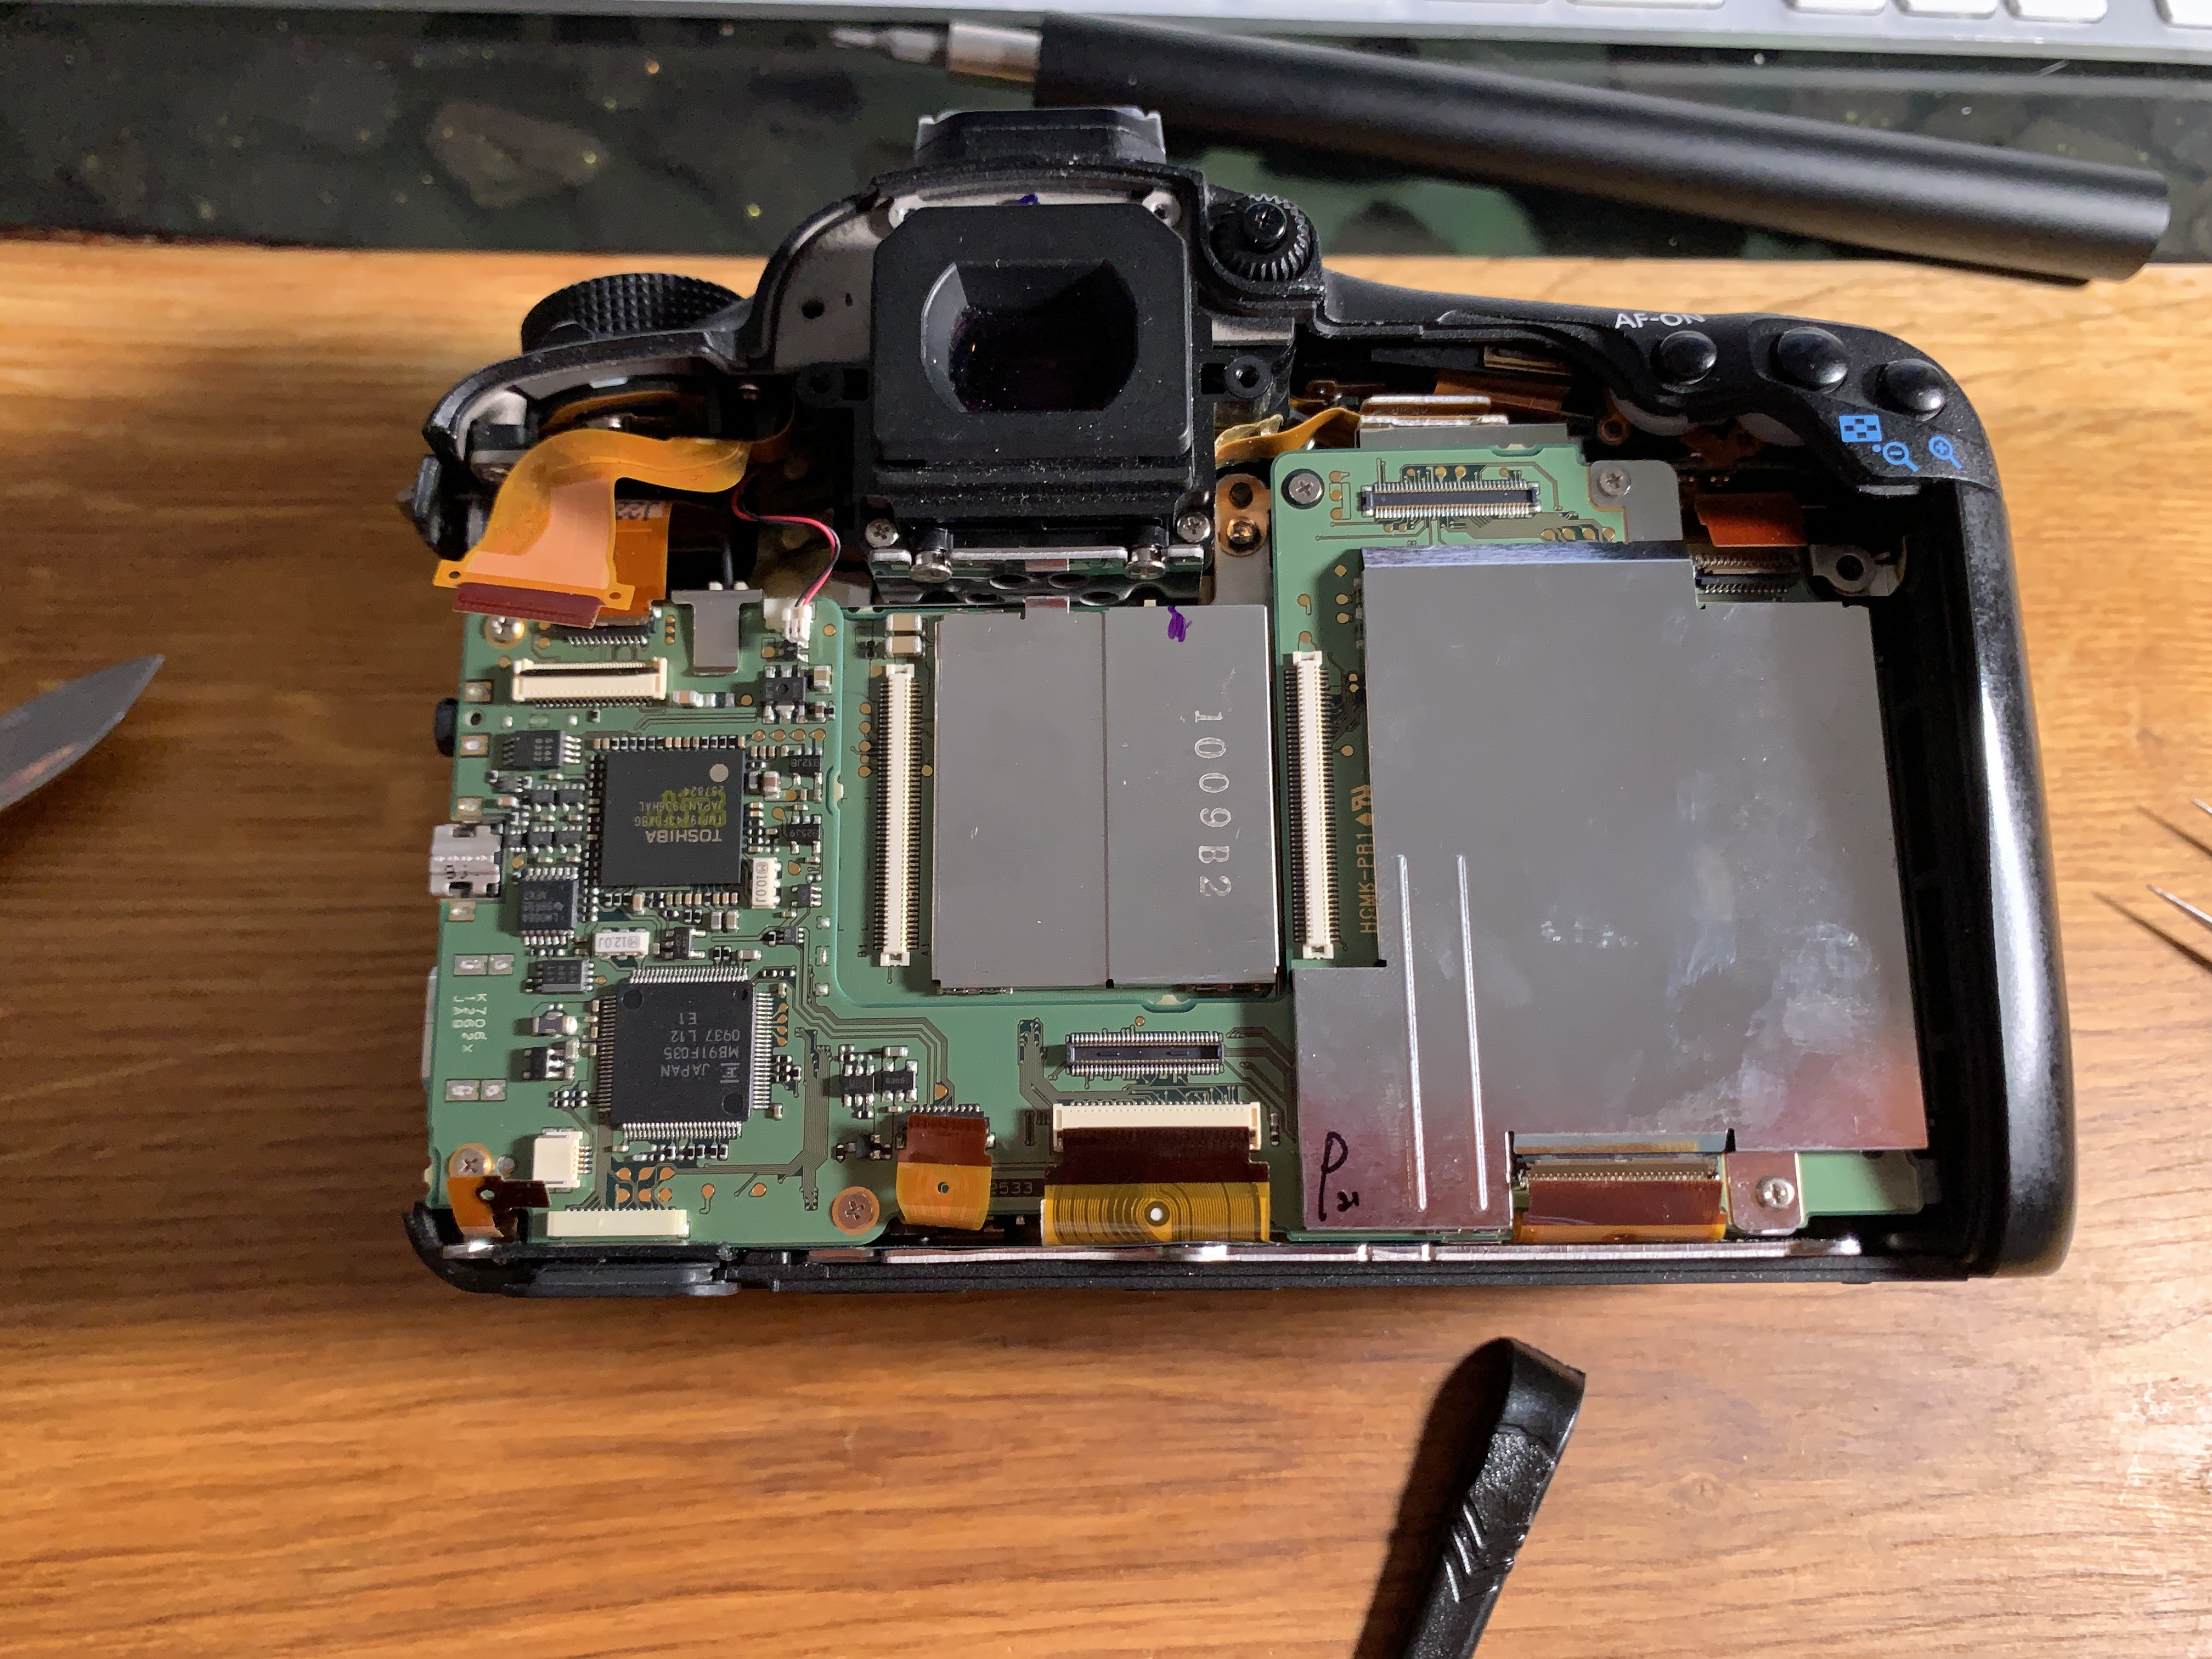
The infrared conversion process was one i was familiar with. I, in the summer of 2023, had converted a Lumix DMC-G5 I was using at the time as a ‘party camera’ - in part due to it’s xenon flash - to infrared by removing it’s hot mirror (the filter that blocks infrared light), but did not fully understand the infrared photography process at the time, so lacked a infrared filter to get the intended effect. When reconverting the camera, it simply never turned back on.
Christmas 2023 I was gifted an old Canon 7d - I loaded the Magic Lantern modified firmware onto it and experimented with the additional features, such as 14 bit raw video, and used the now internal intervalometer for various bits of studio and timelapse work. It fell to the wayside however during component 1, It’s lower resolution, less versatile RAW files, much larger/heavier body, and worse lens meant I rarely used it. So when the need for a ‘sacrificial’ camera was needed, it was perfect.
I researched the conversion process, mainly through disassembly, but also online as a feasibility check. I checked the lens I would end up using wasn’t susceptible to infrared ‘hotspots’, and then commited. I documented the process for my workbook - and in case I forgot how to reassemble it.
Images
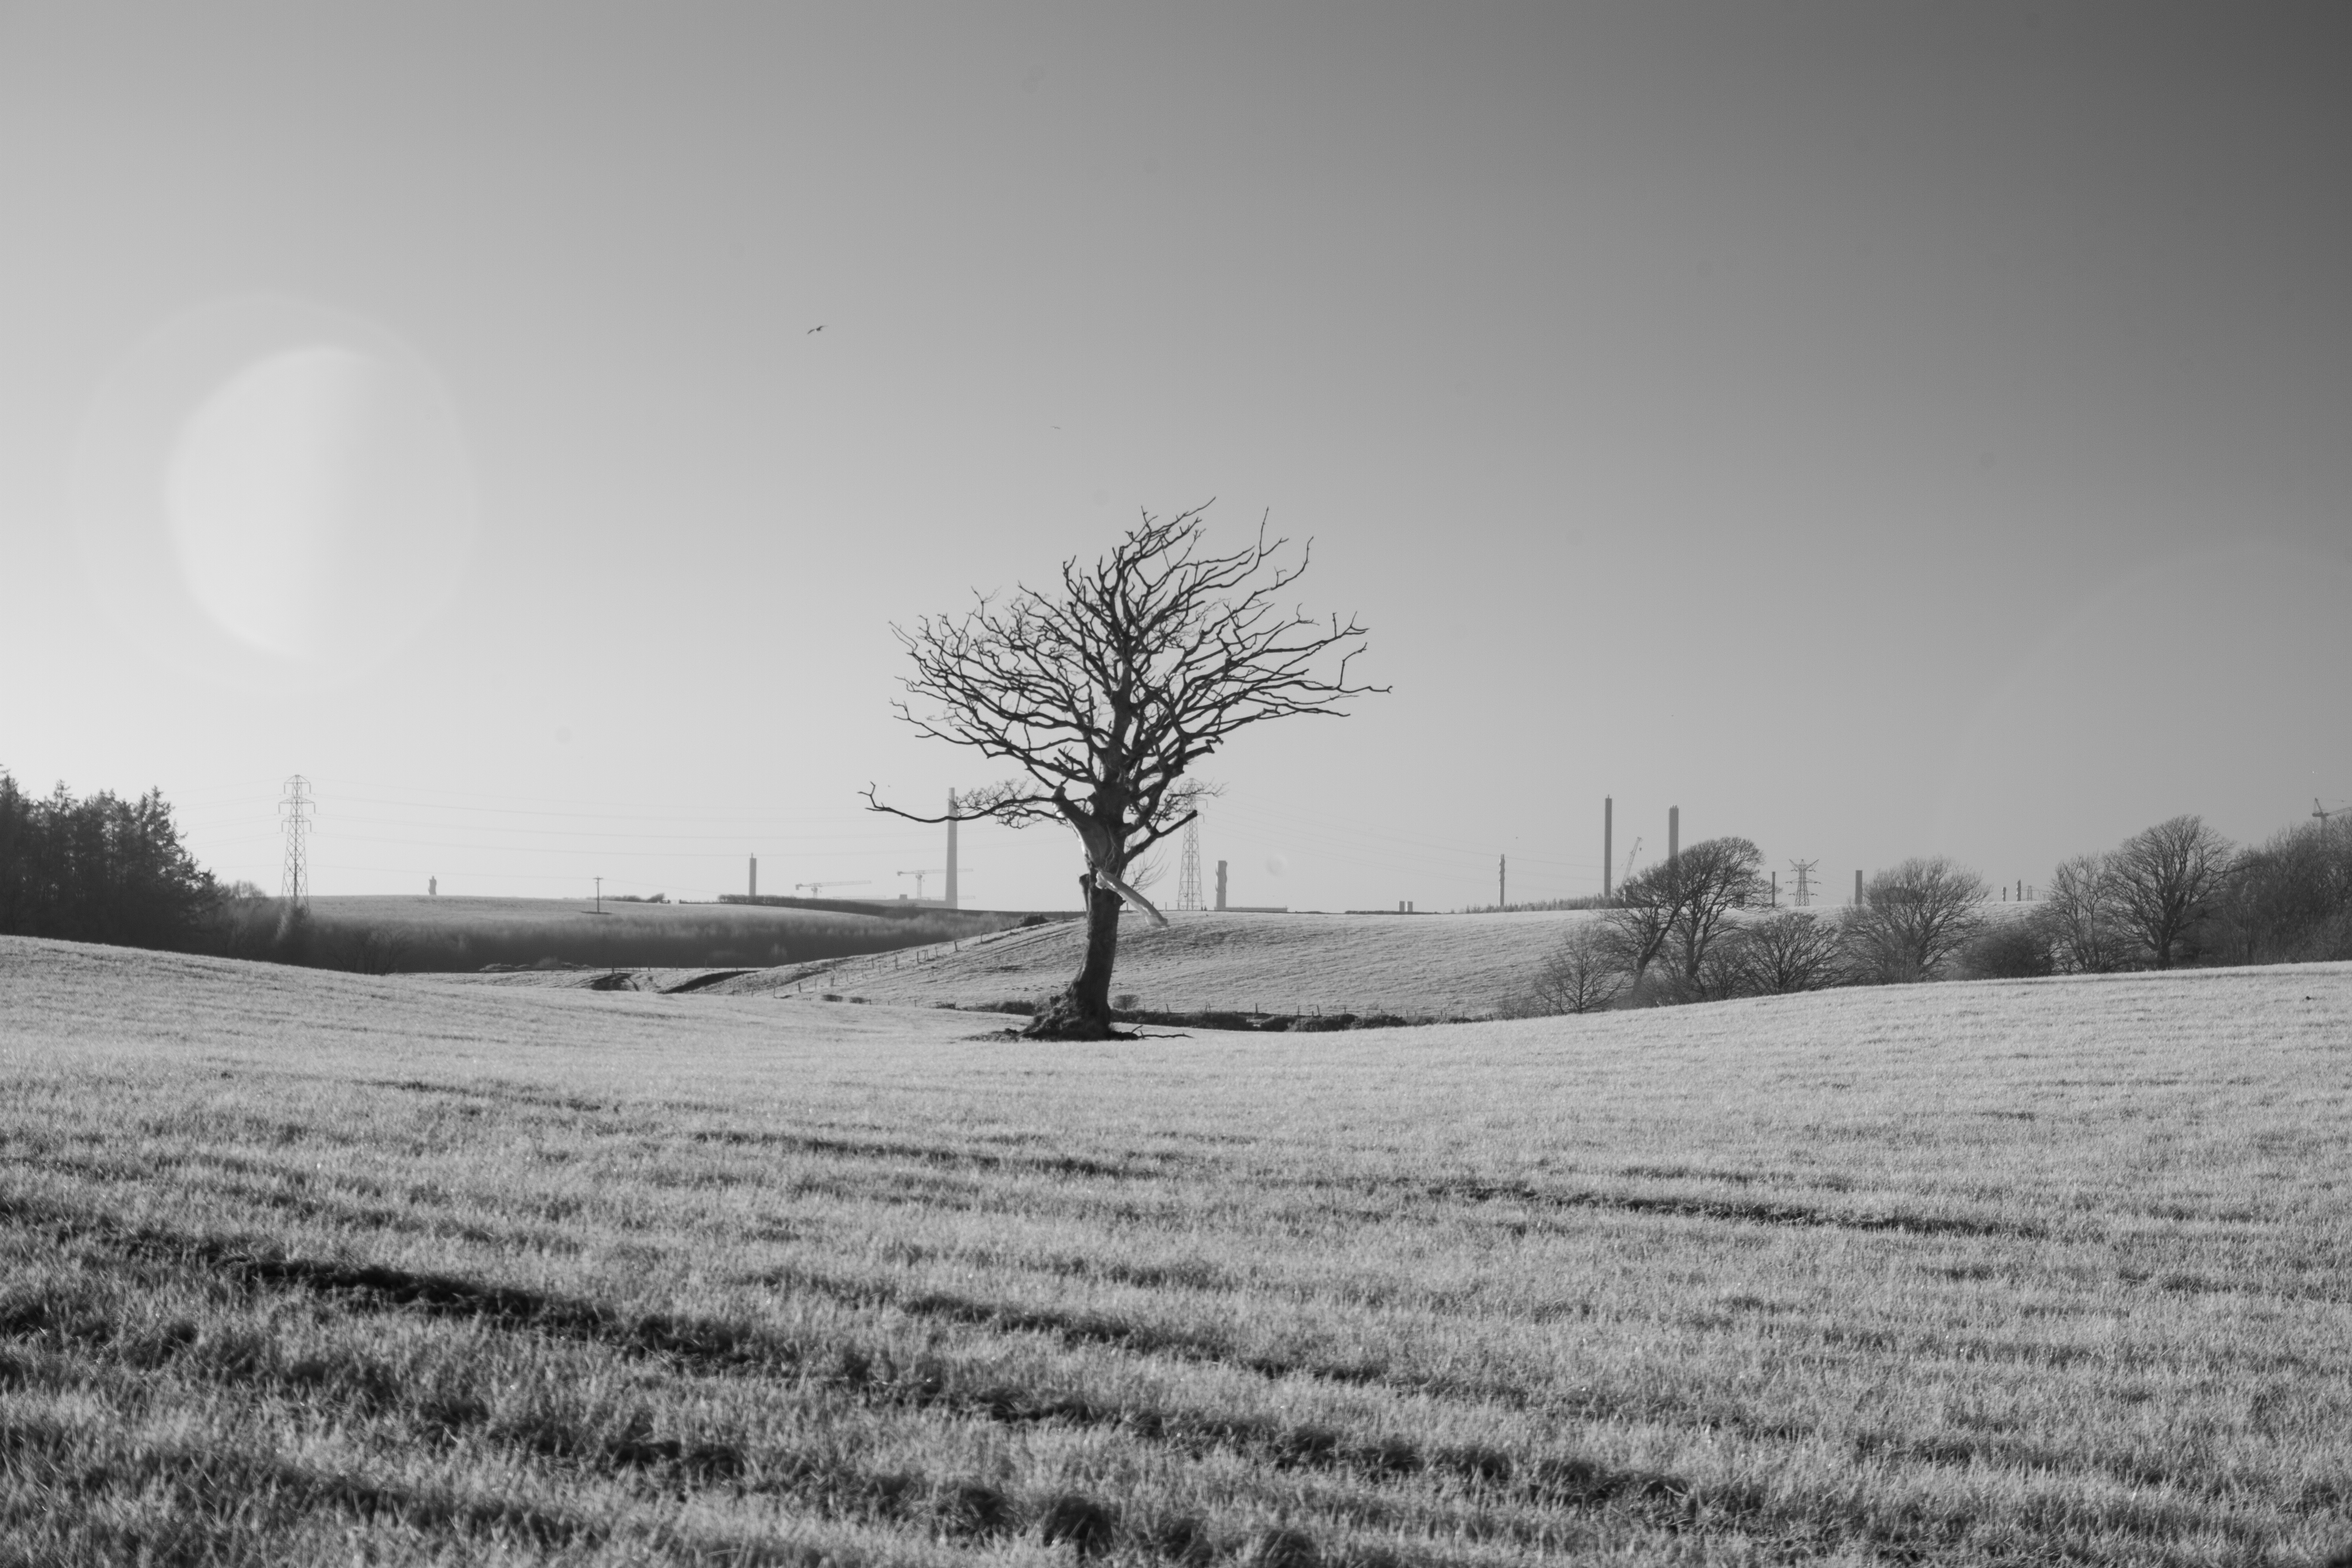
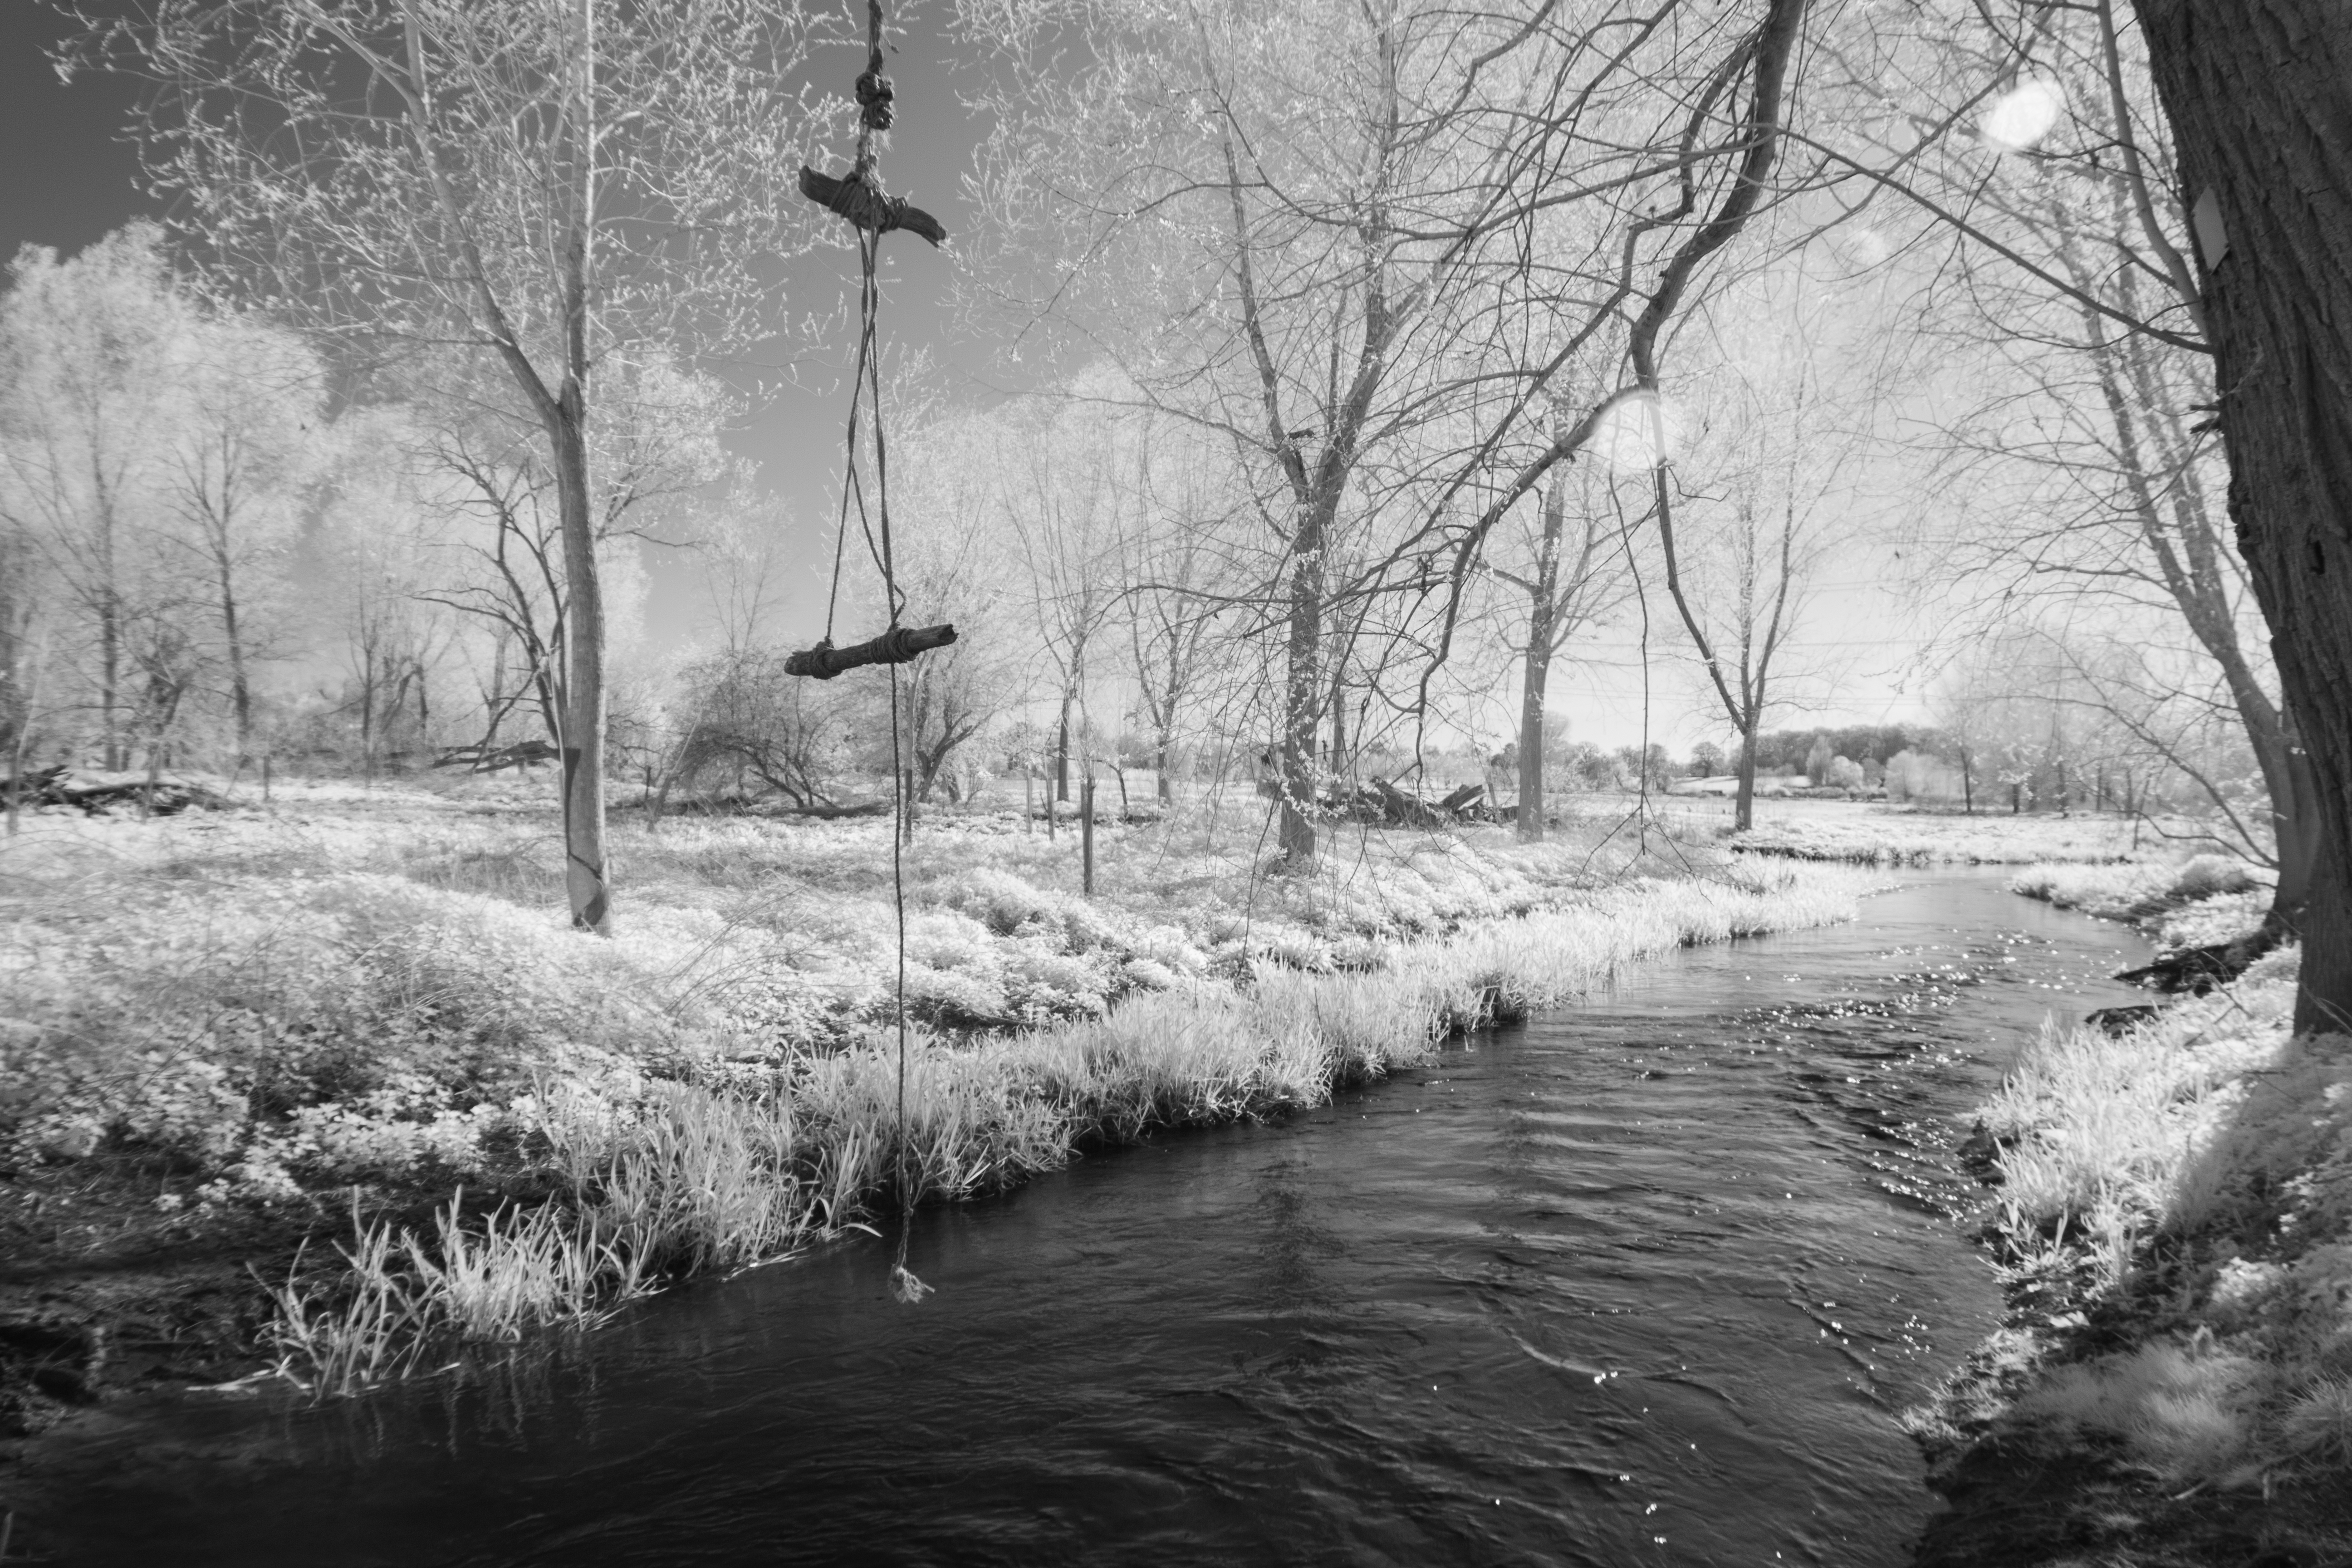
The camera could now shoot infrared! - full spectrum to be specific - but this was February - grey, overcast, and with little vegetation.

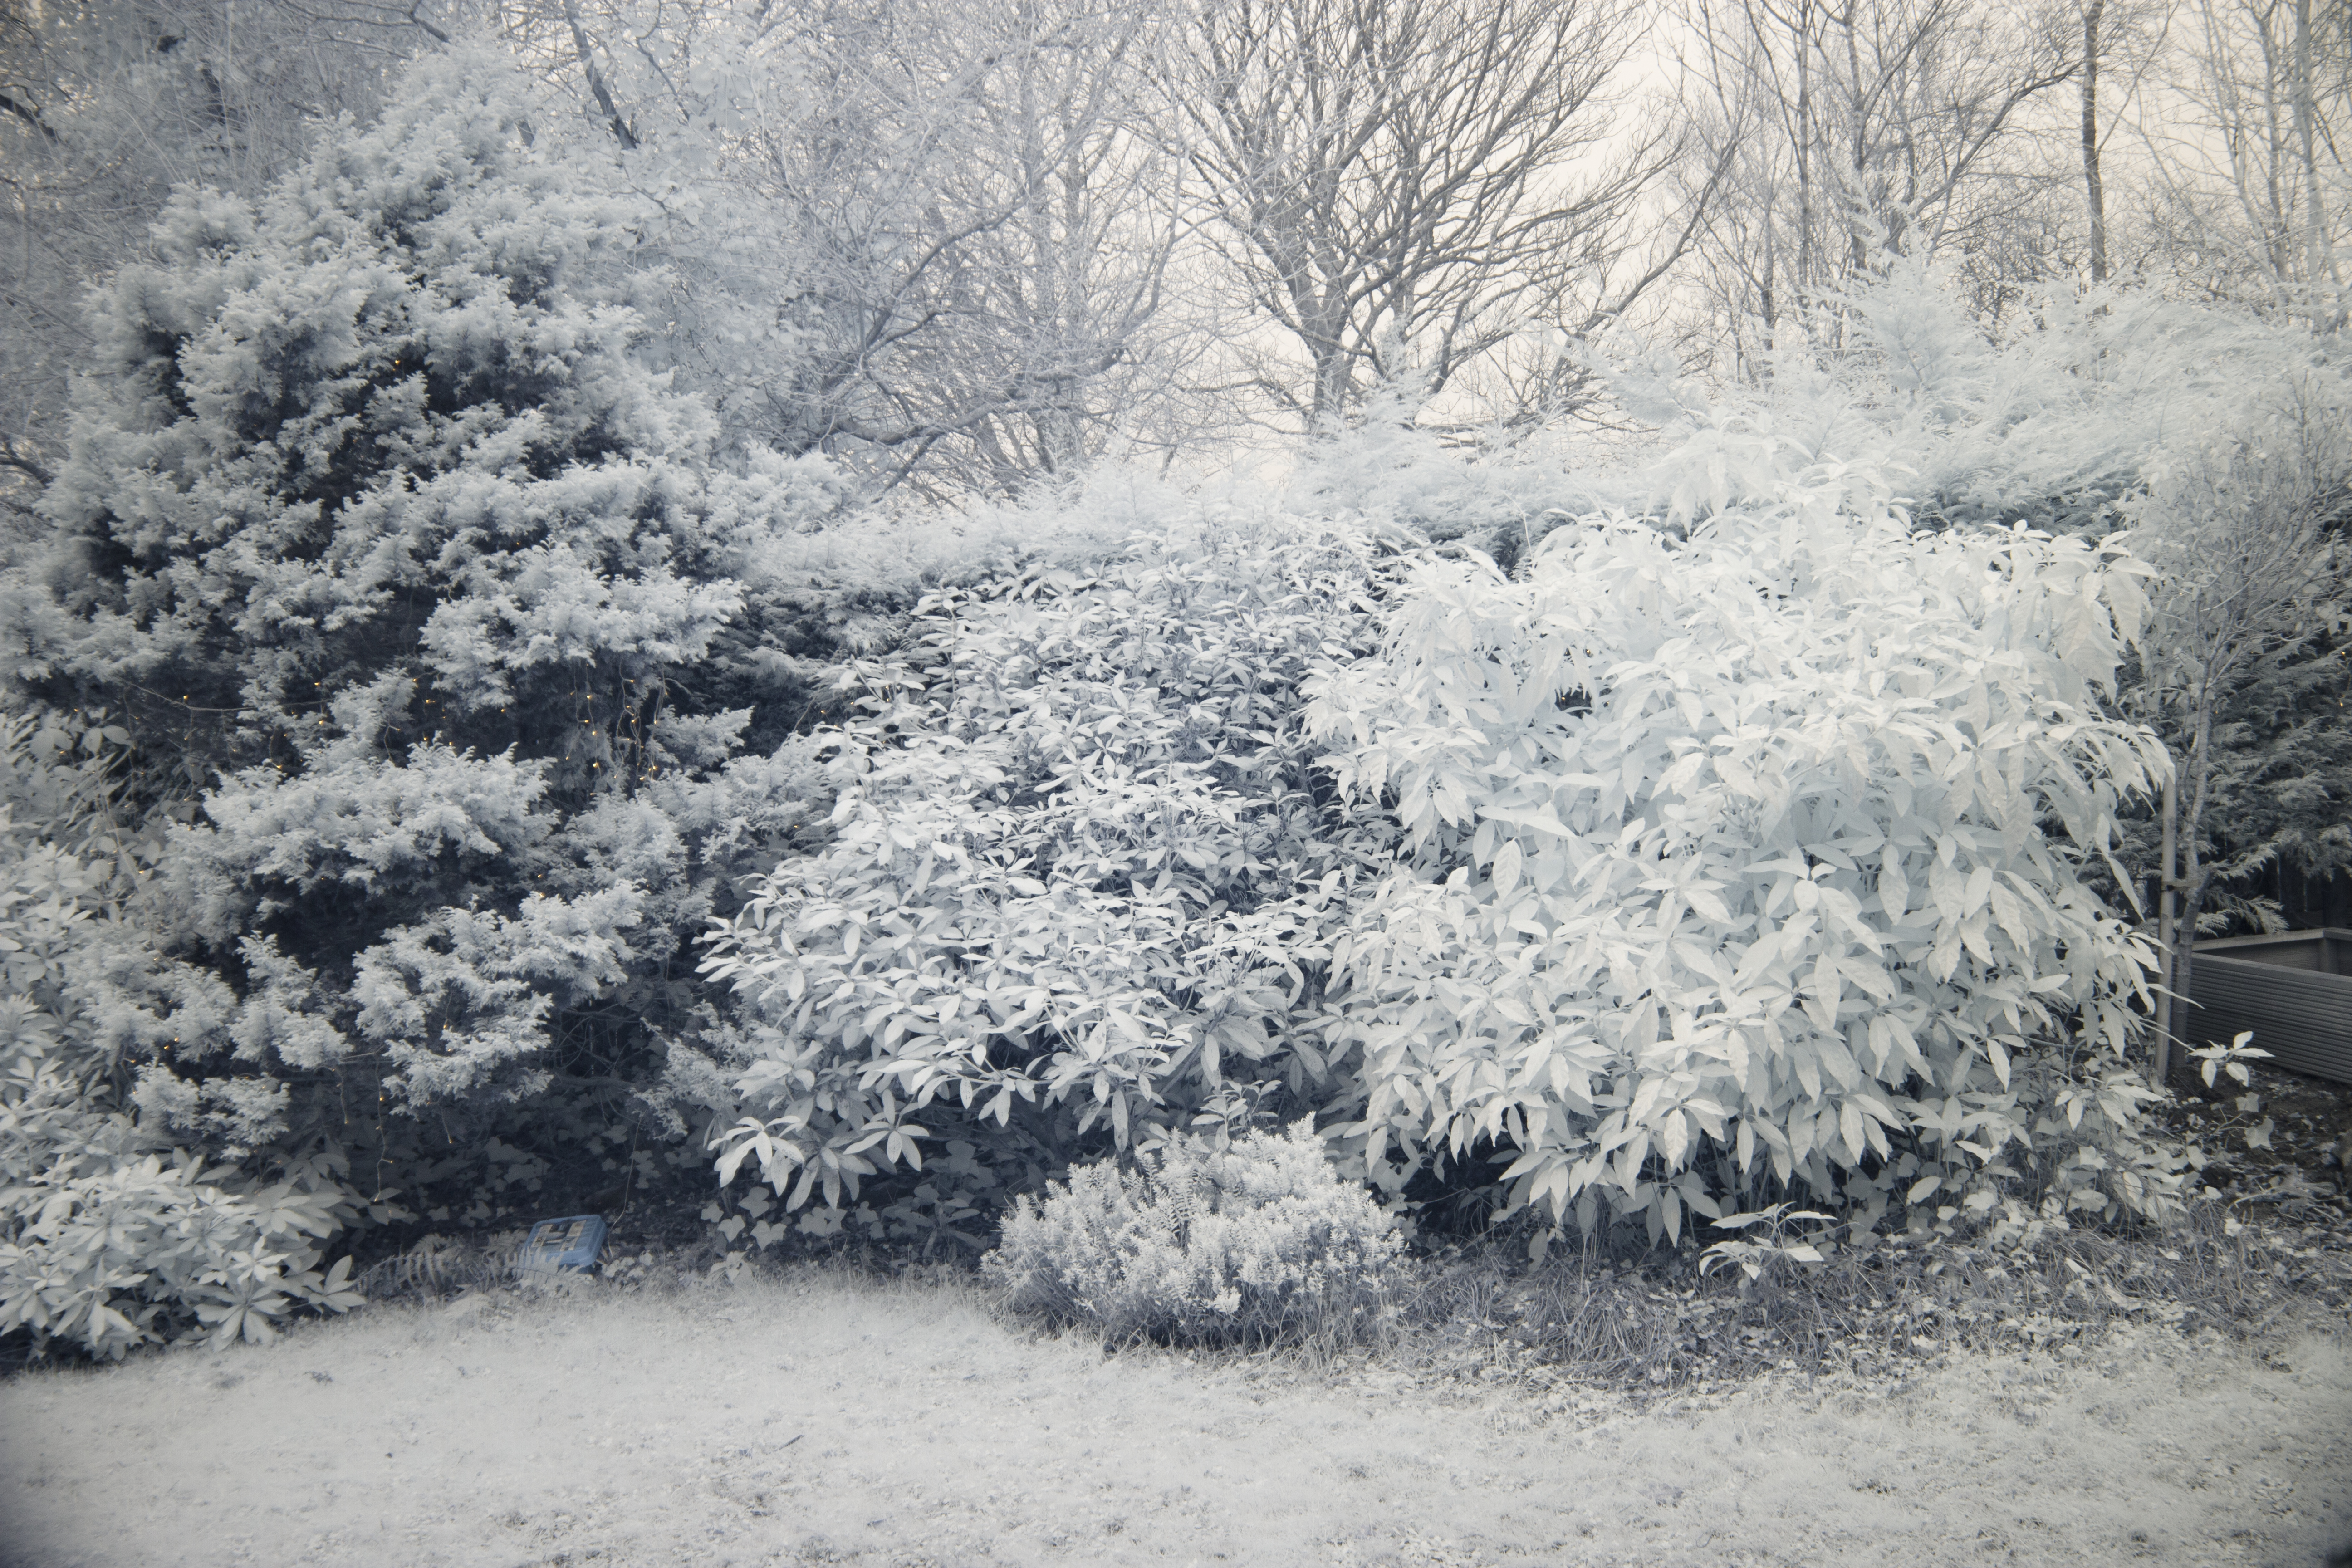
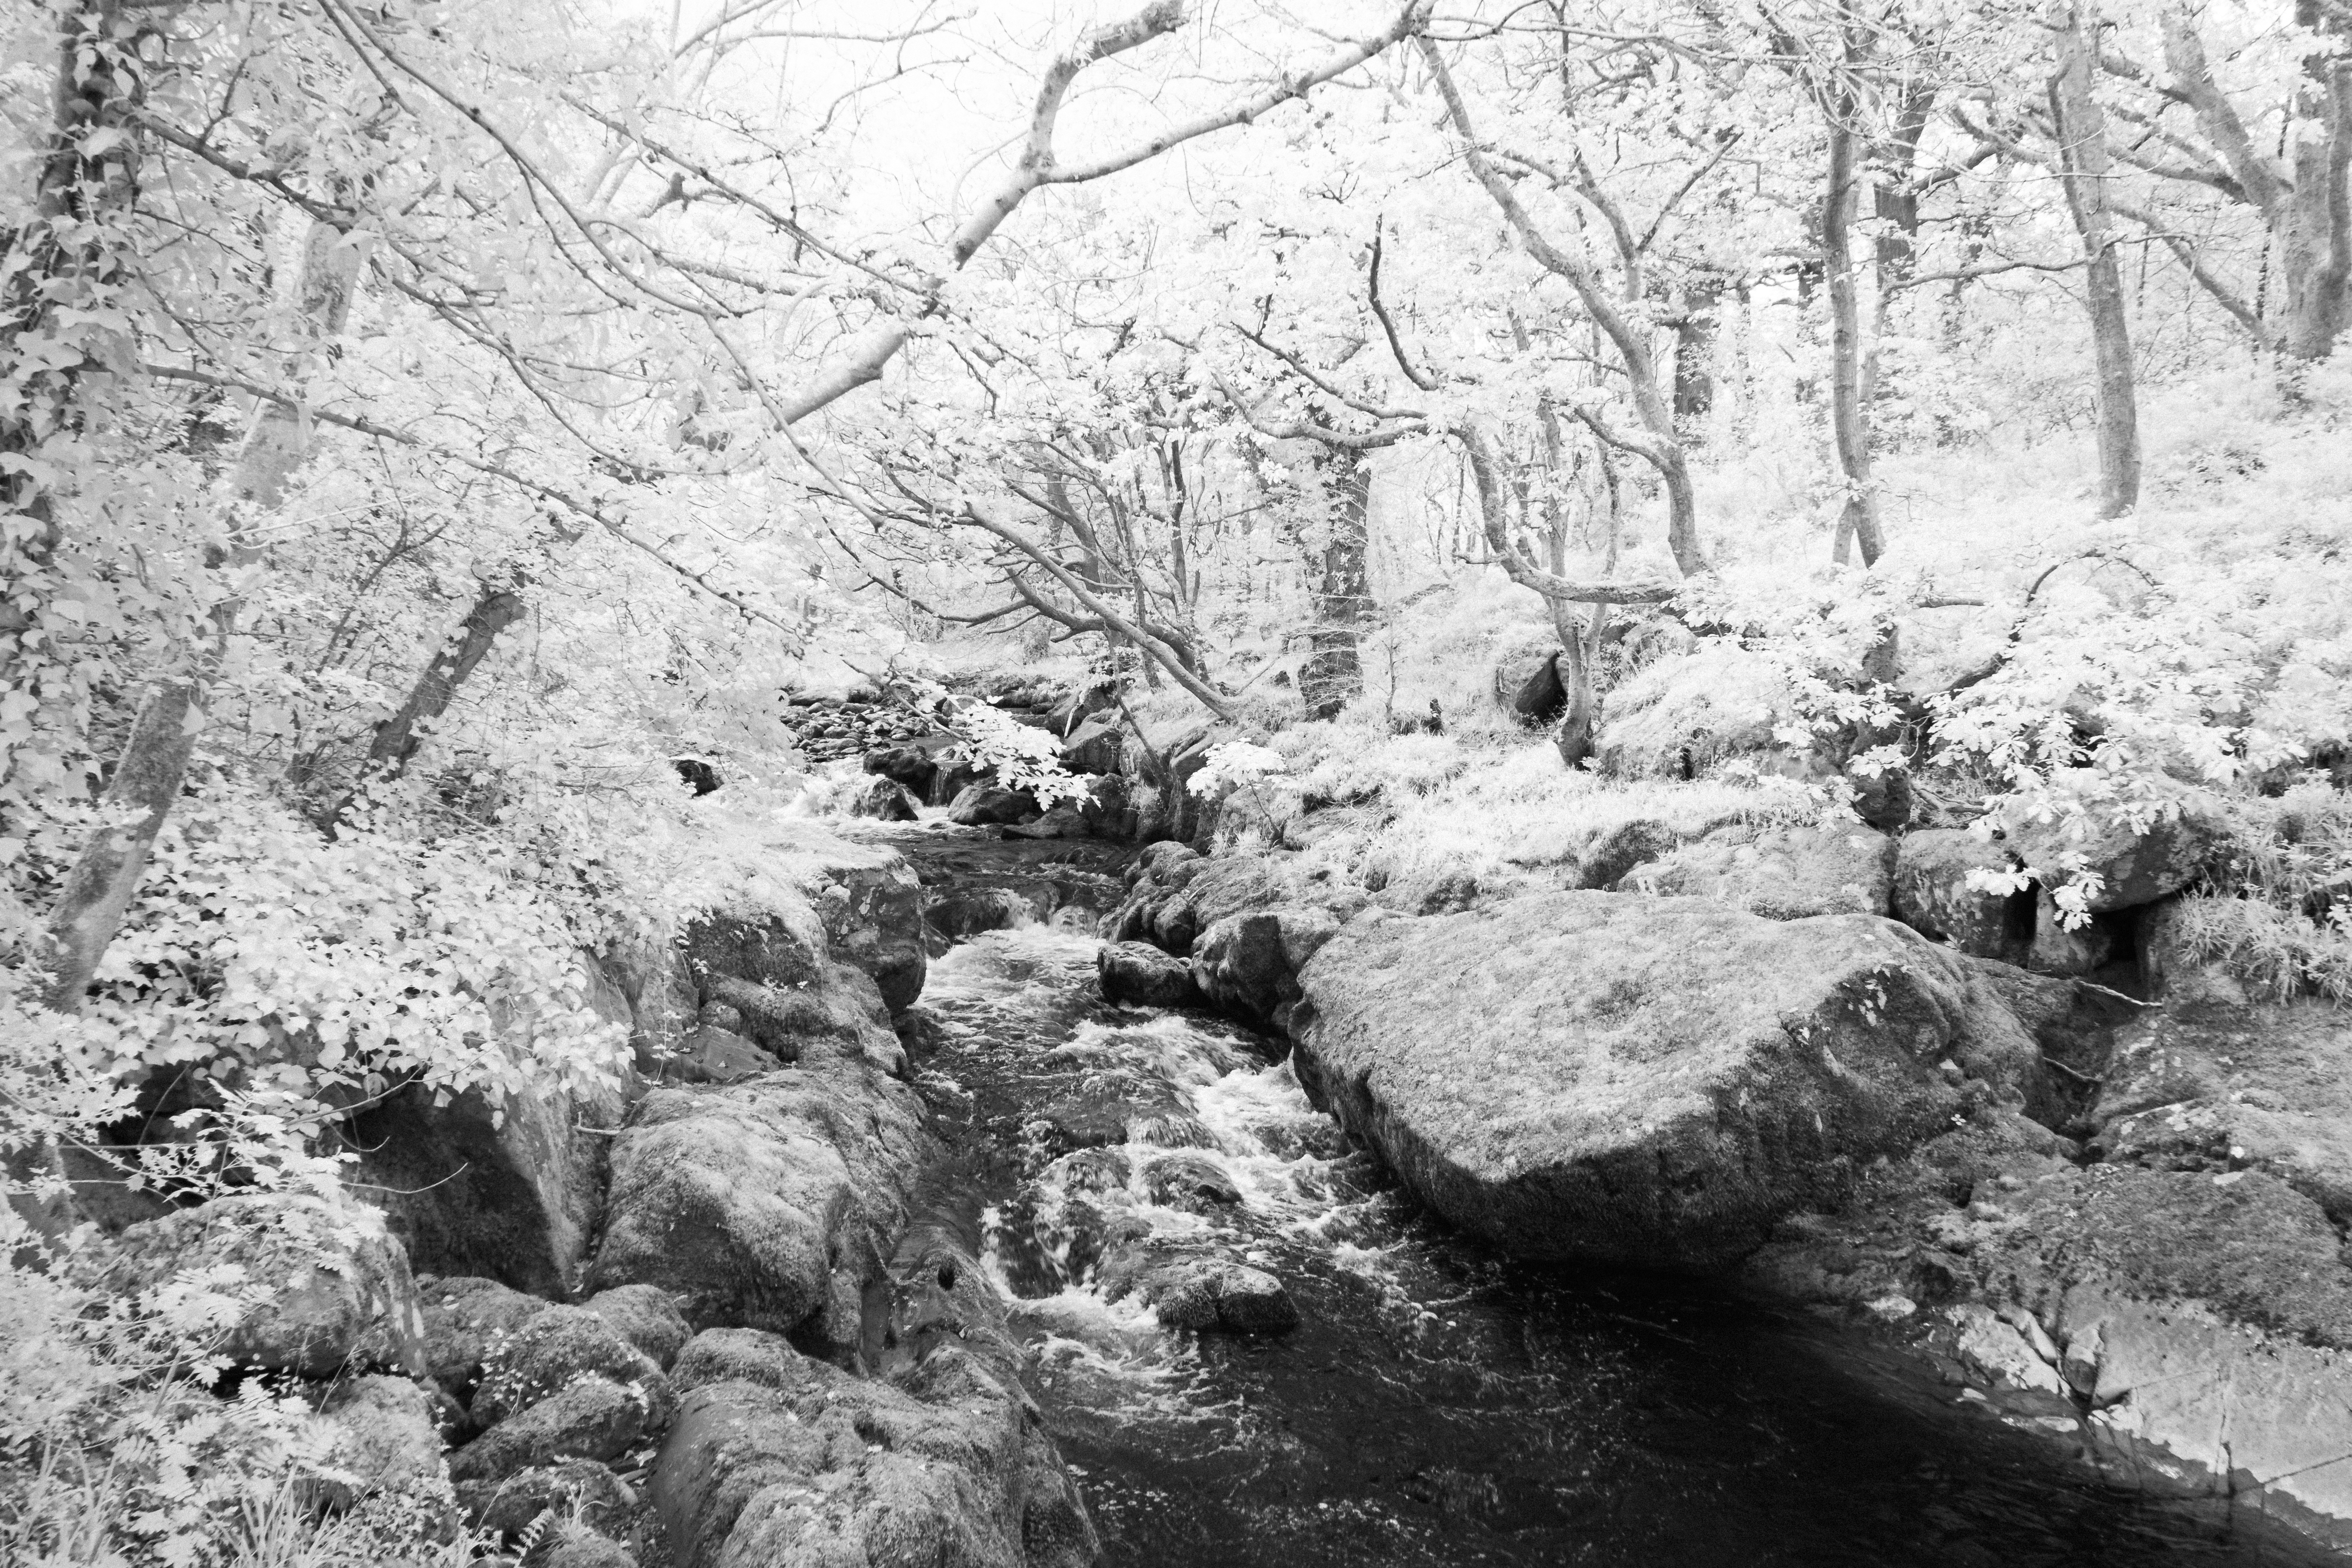
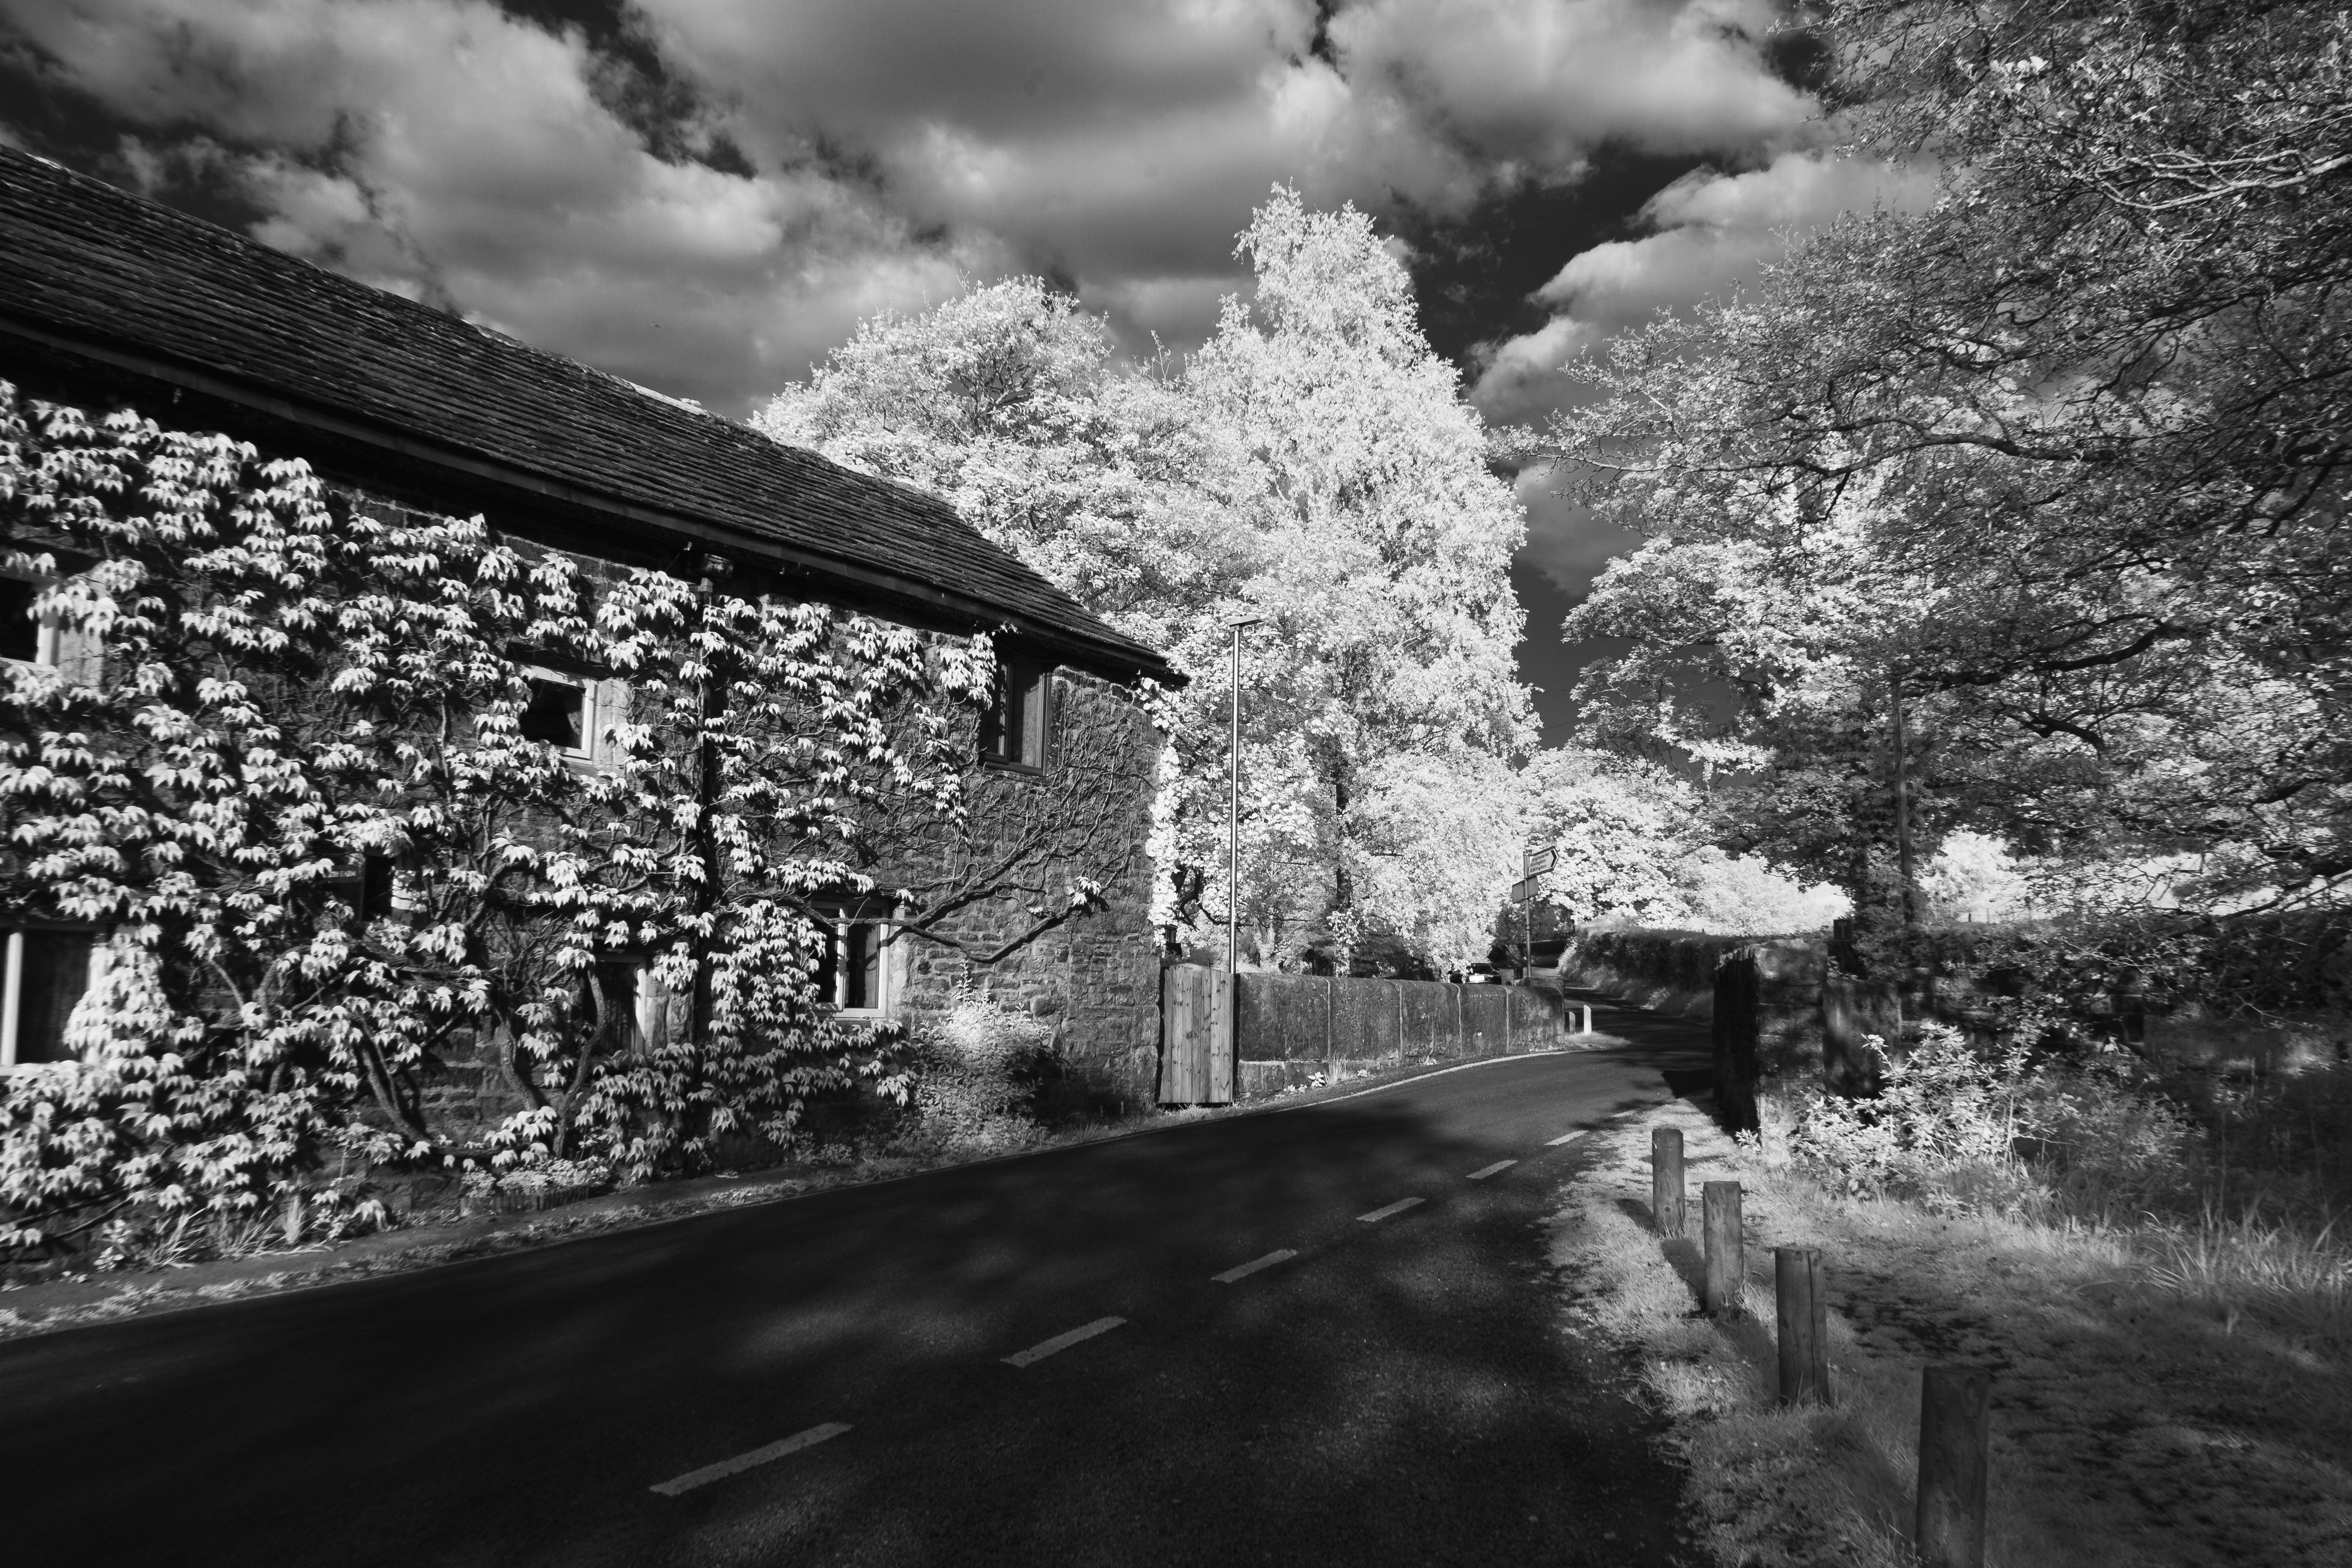
The first, slightly green/brown image is the converted camera without a R72 filter, the second, almost monochrome image, is with.
The R72 blocks all wavelengths of light shorter than 720nm, meaning, the visible light spectrum is not let in, only infrared light.
Again, this was in February, the only light is overcast and dull, and there is little vegetation to test the reflectivity and Wood effect.
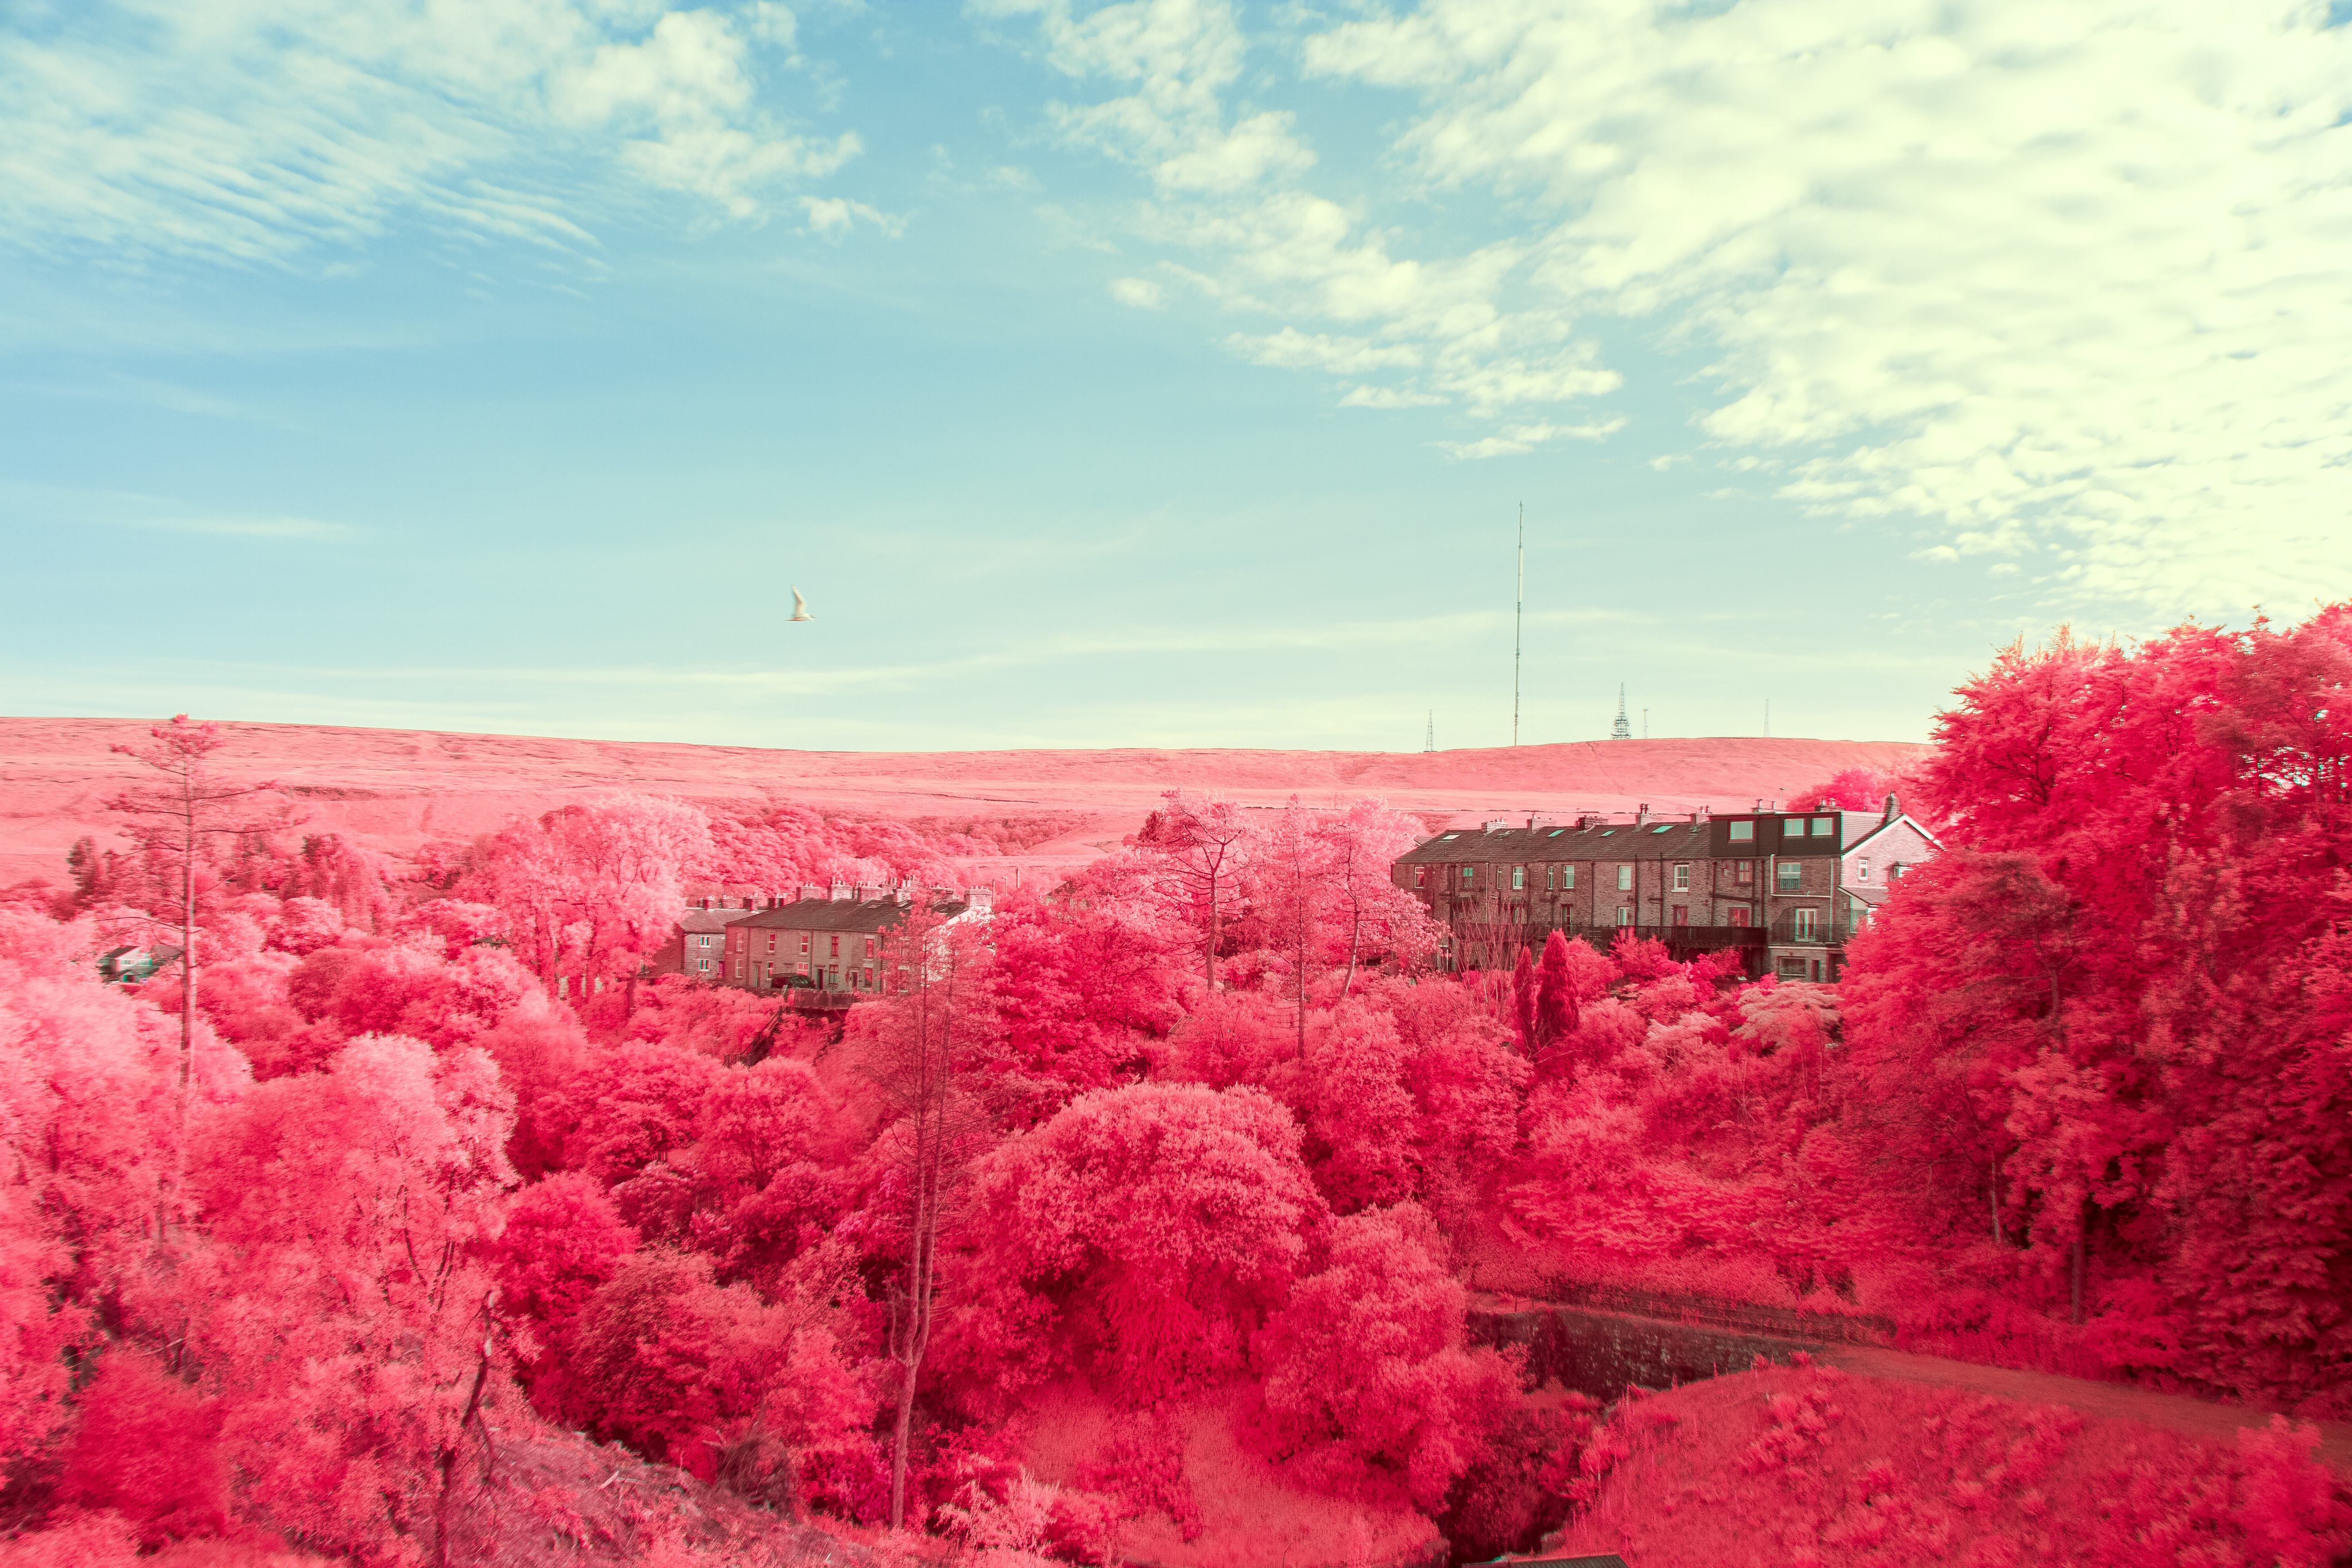
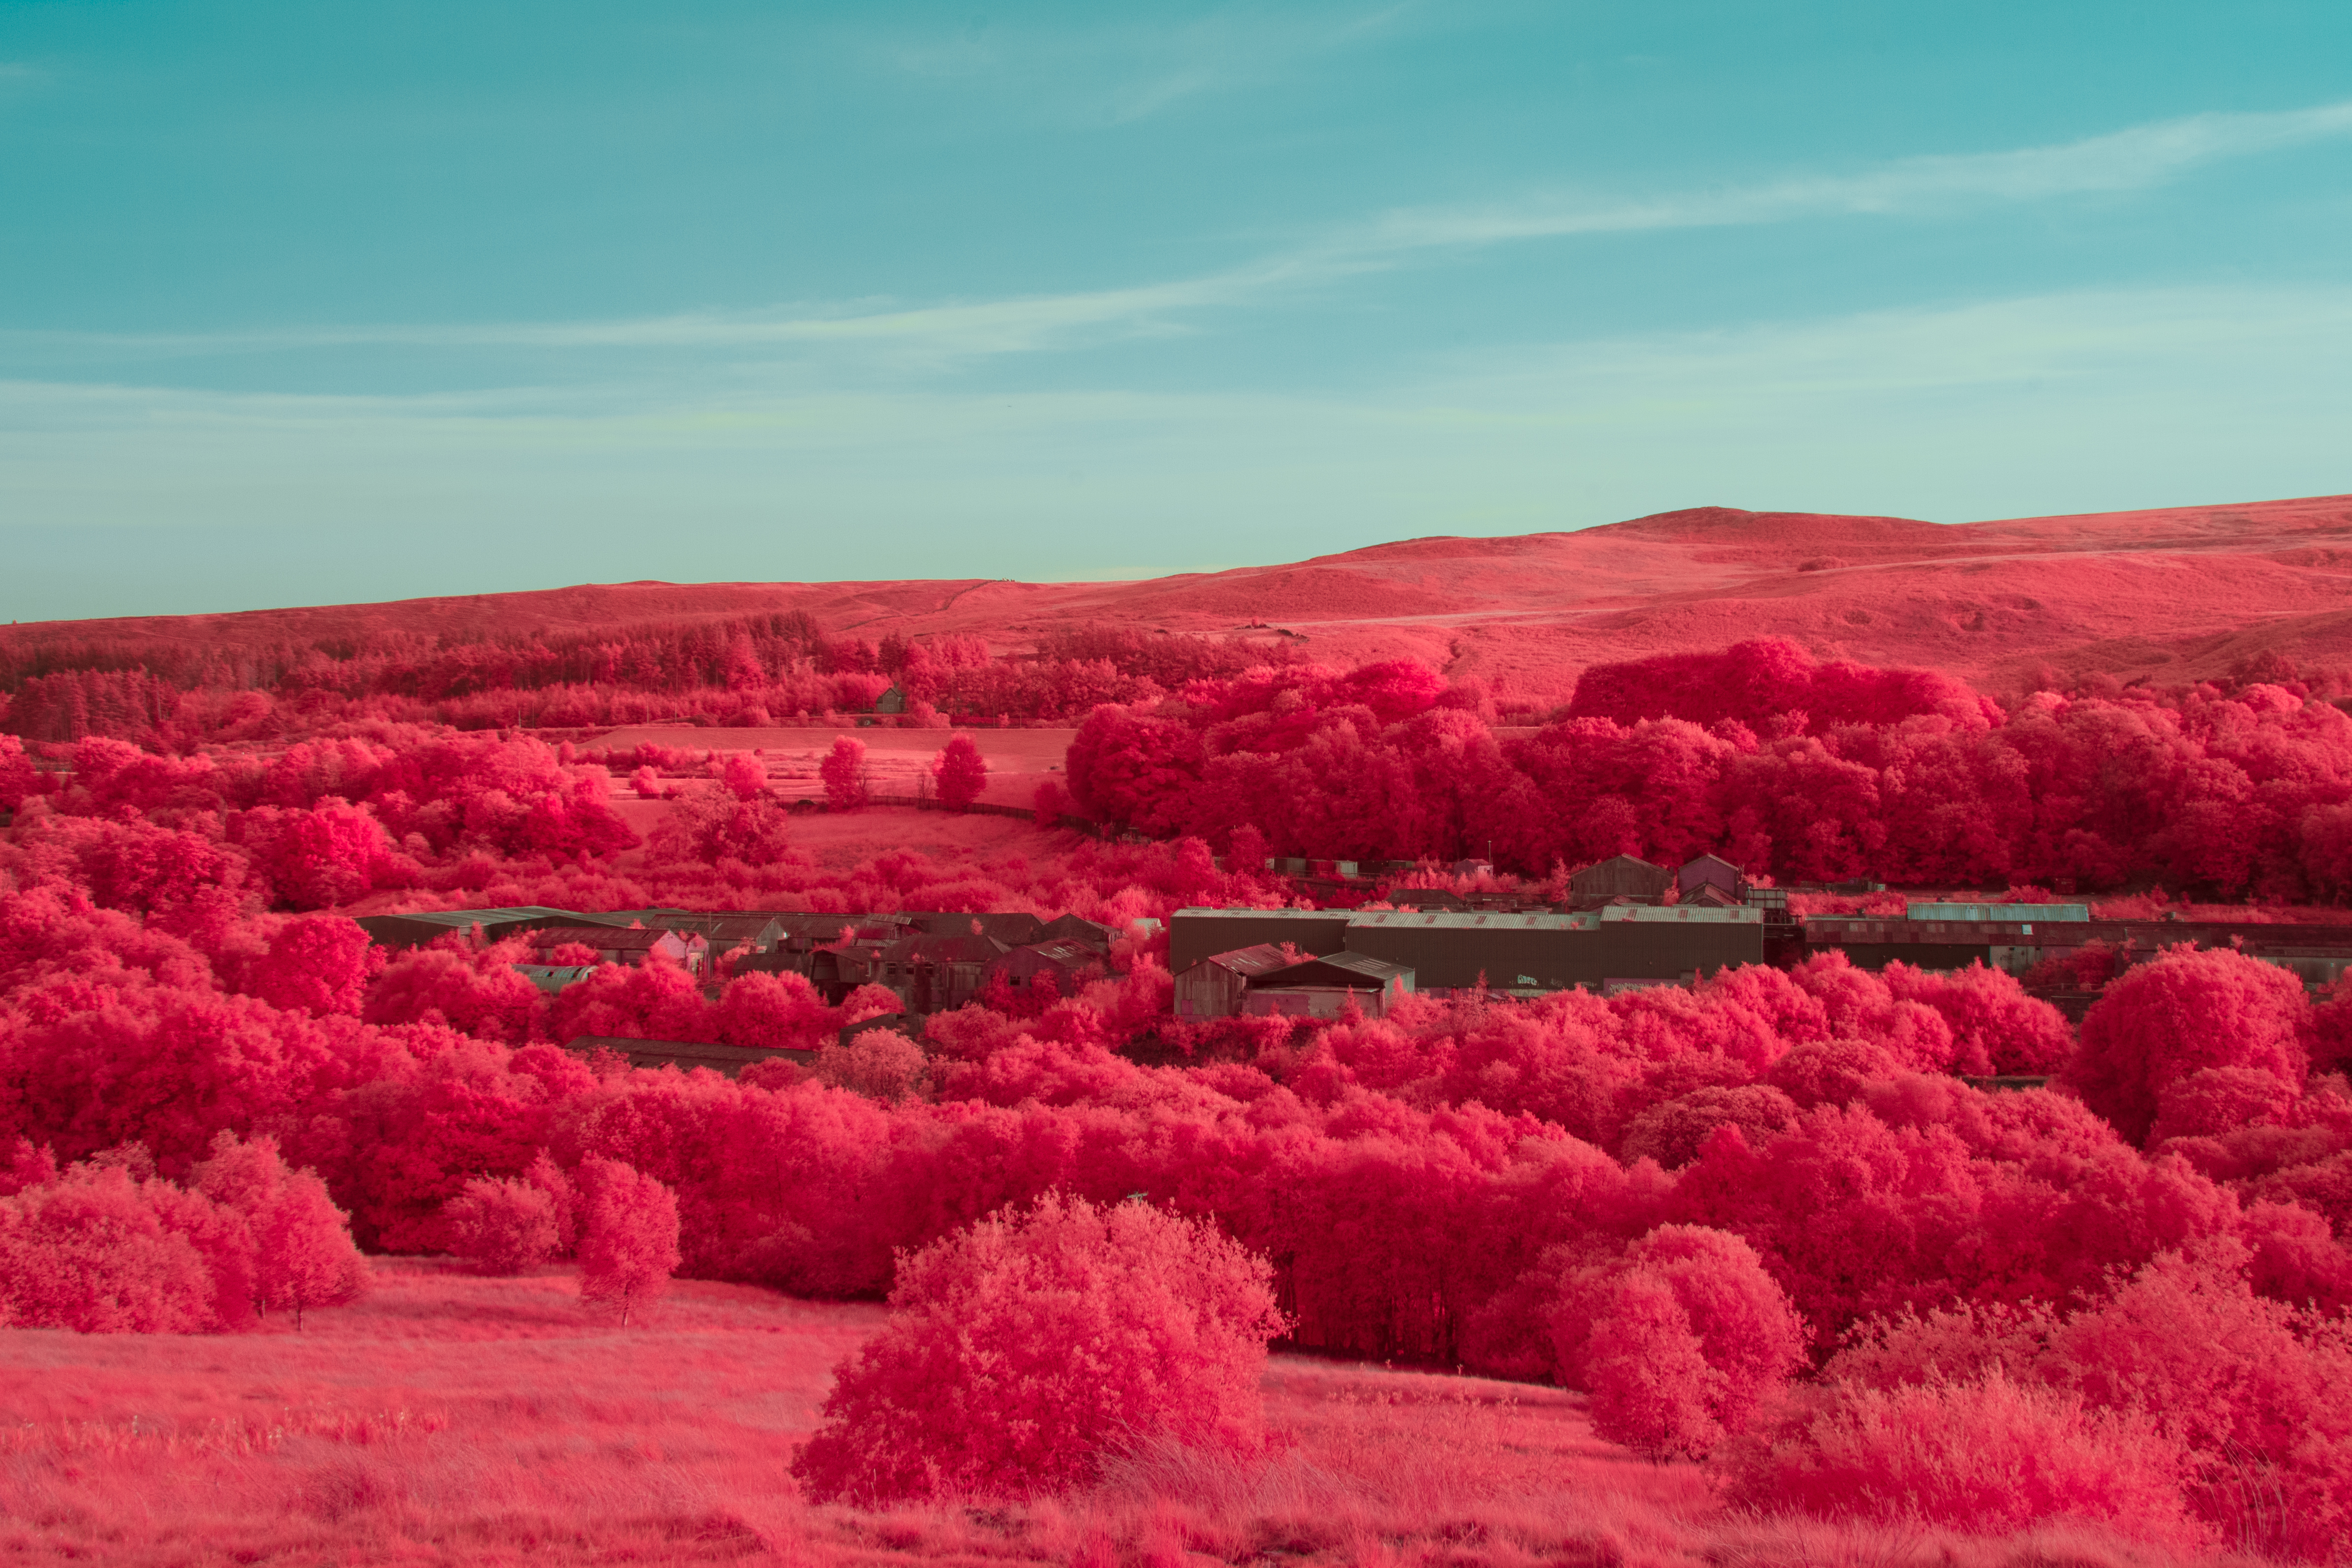
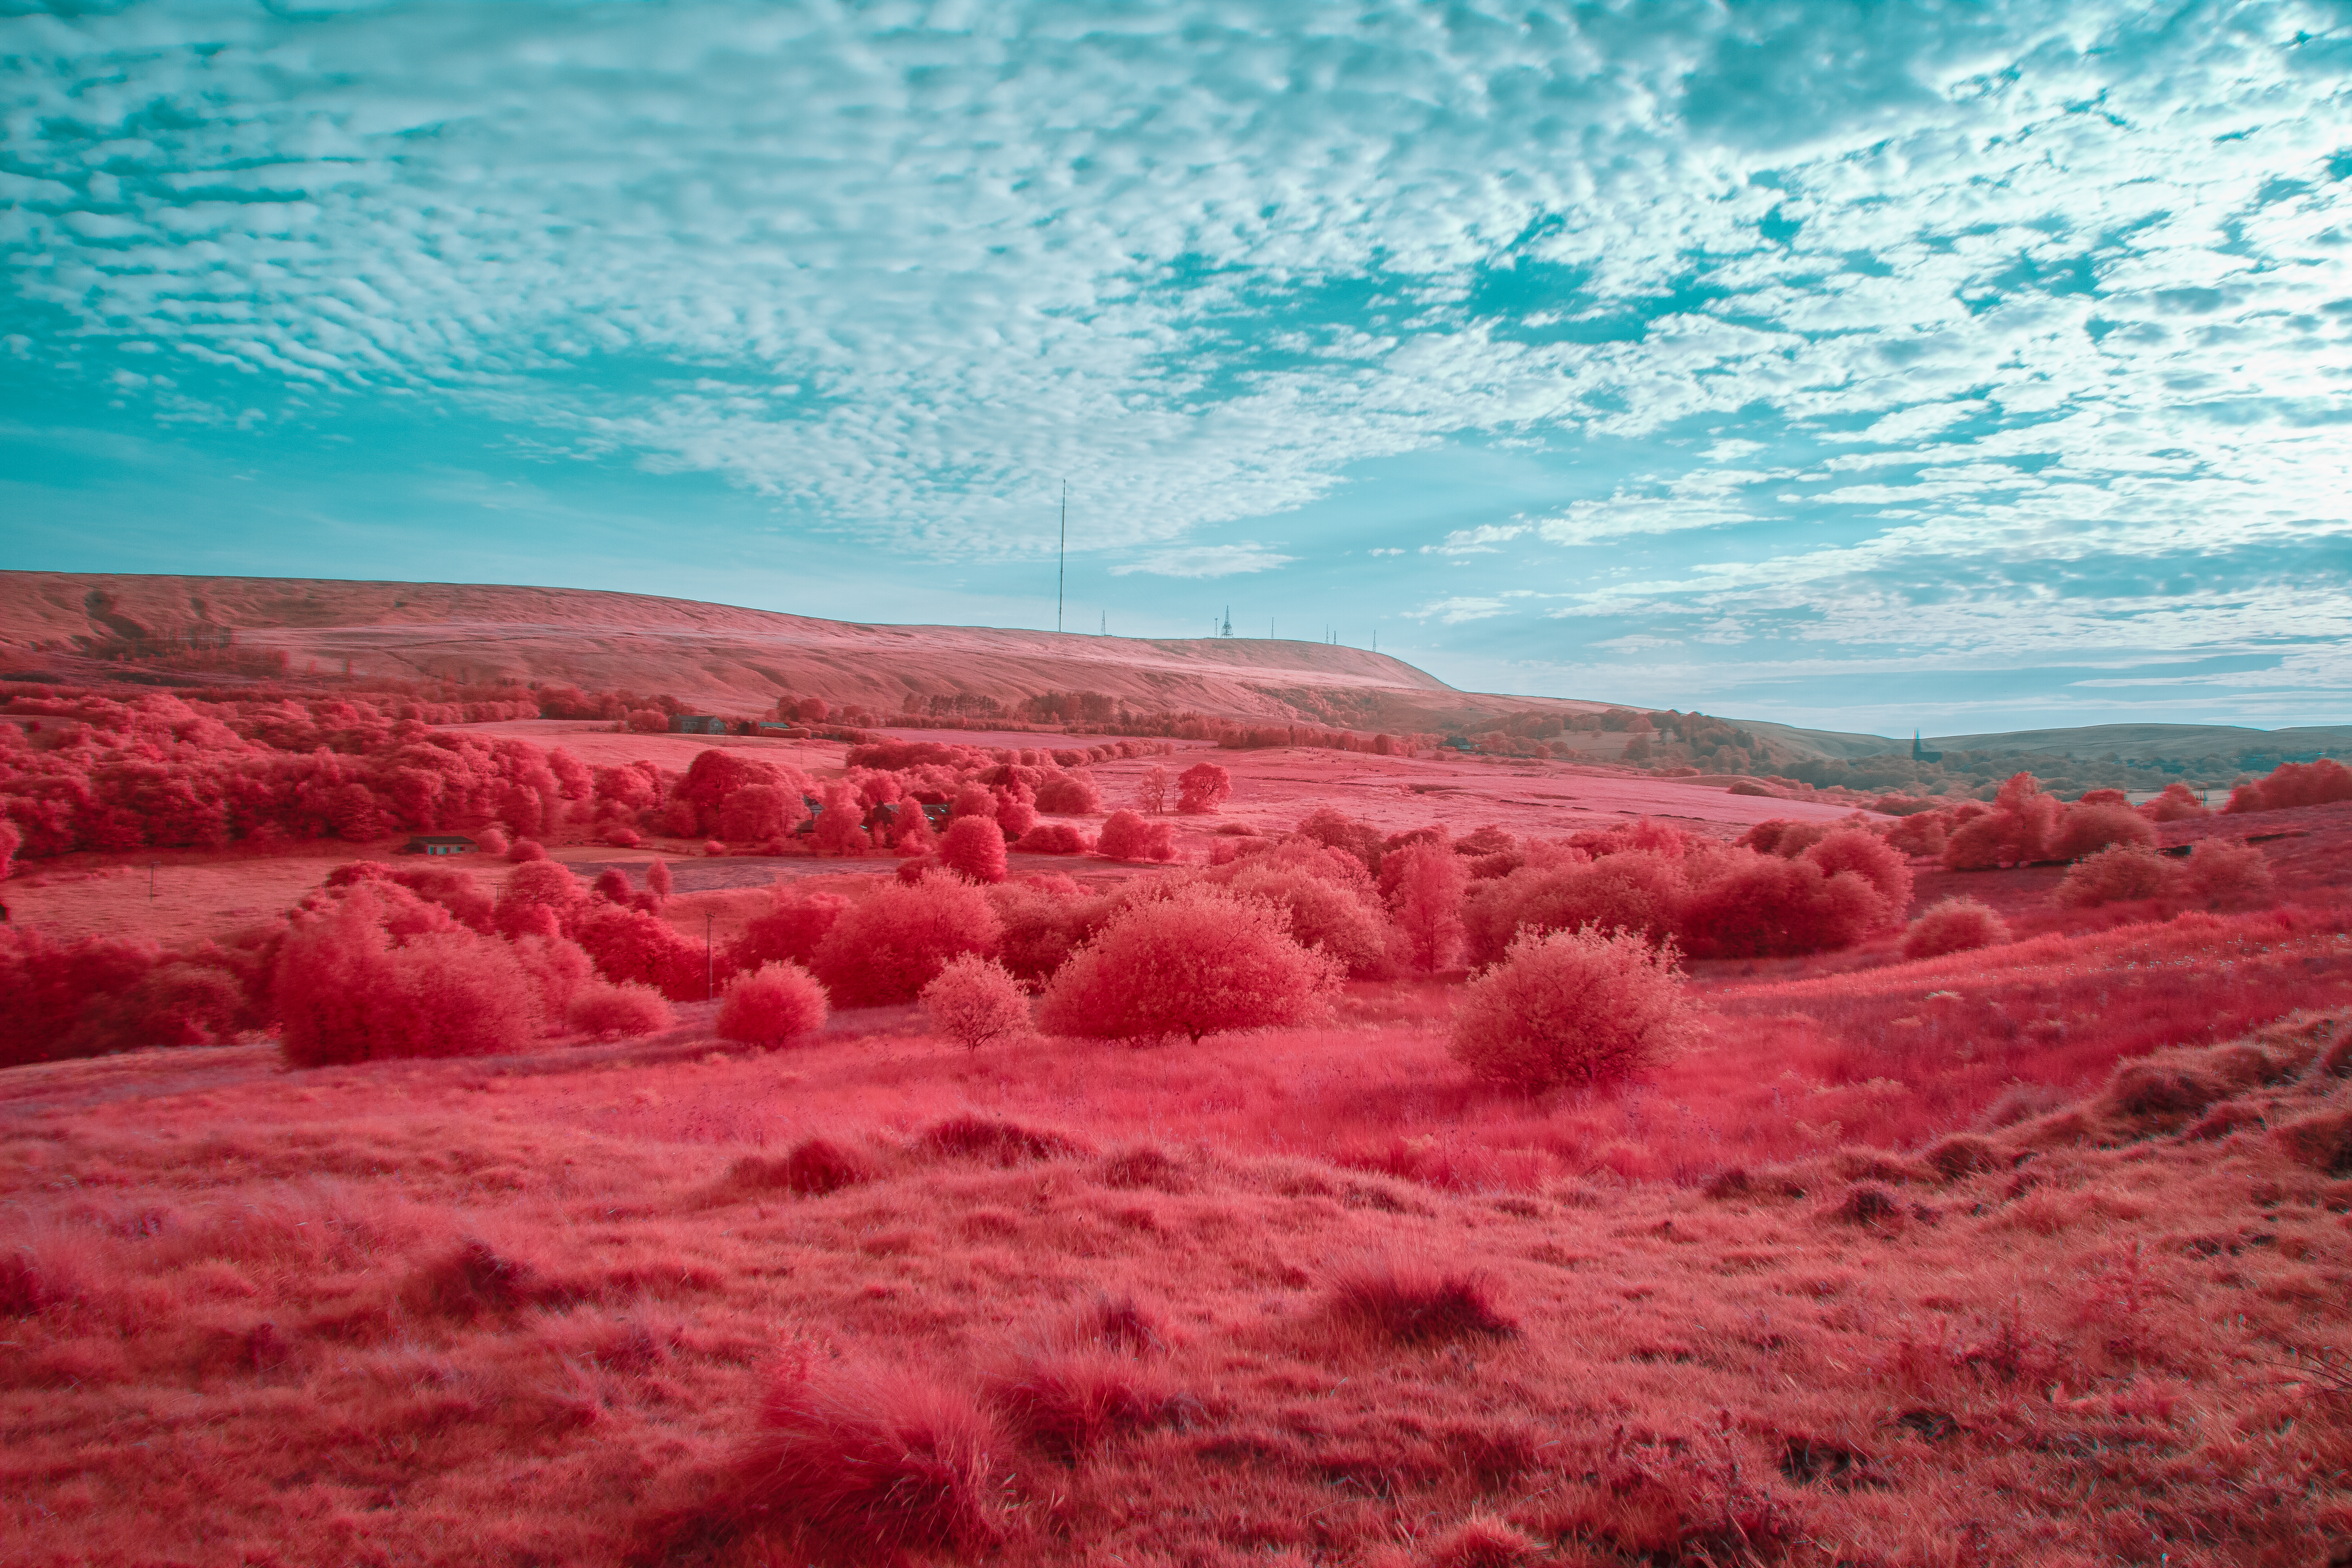
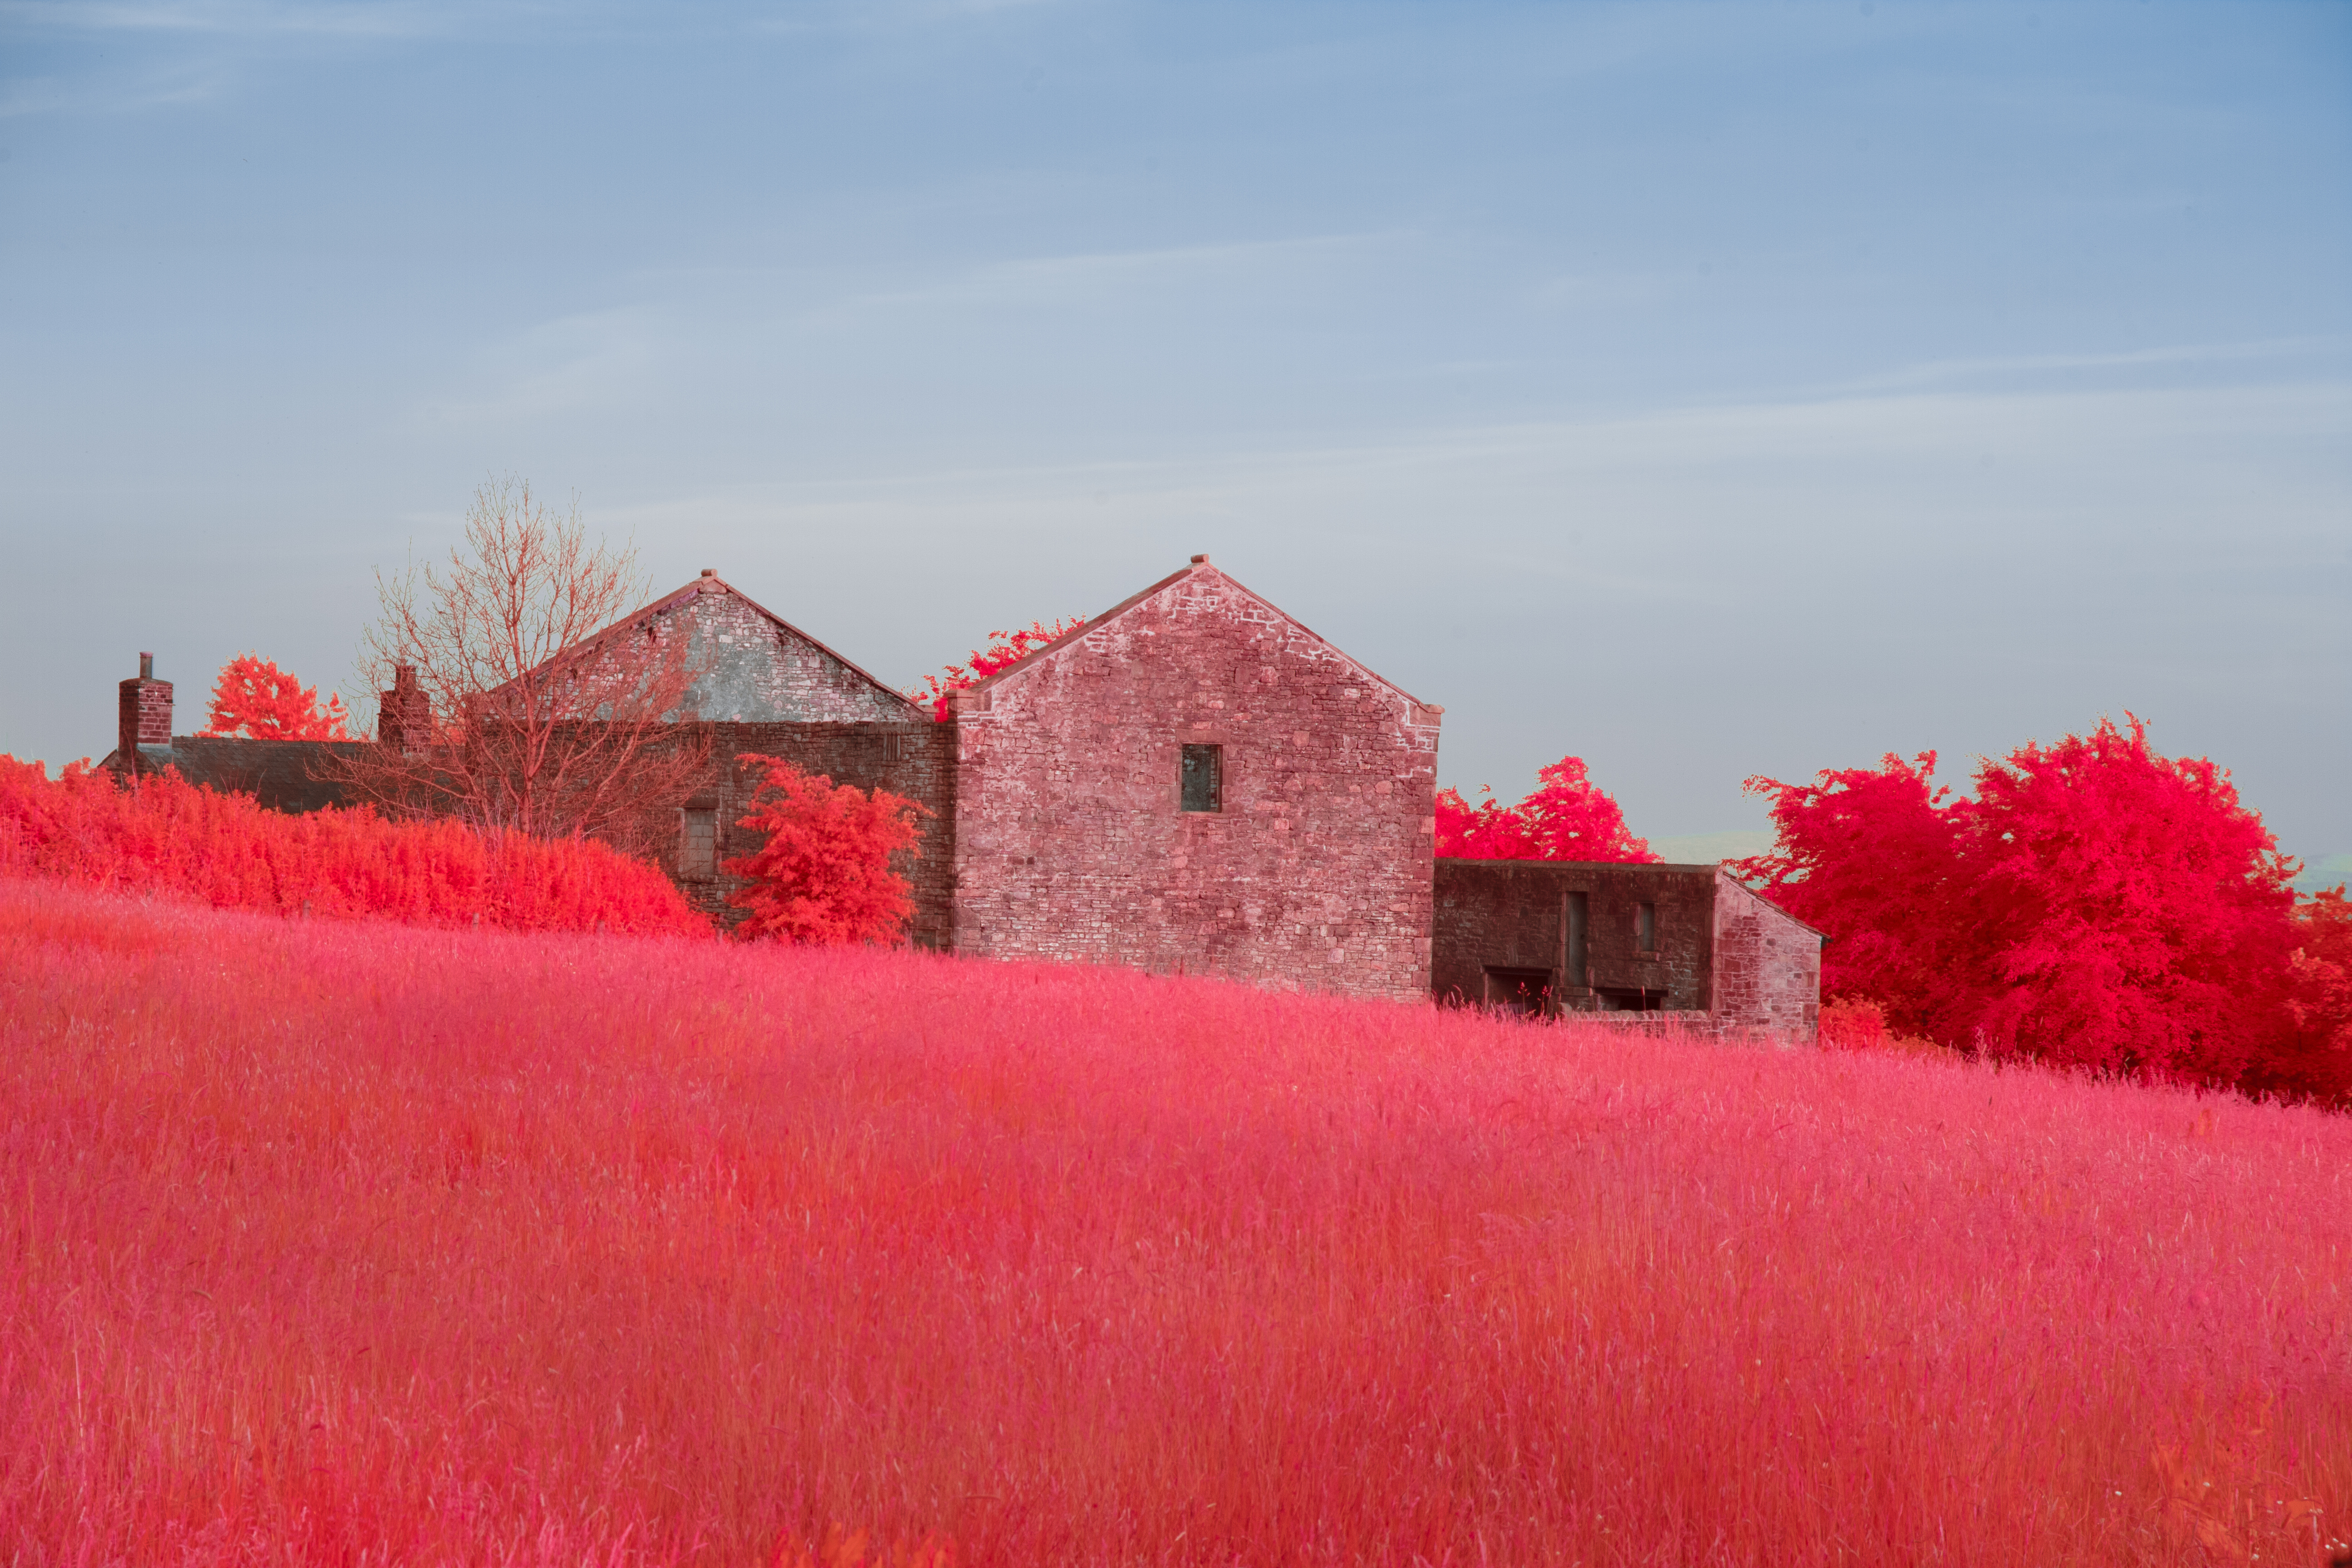
Some example infrared aerochrome look images:
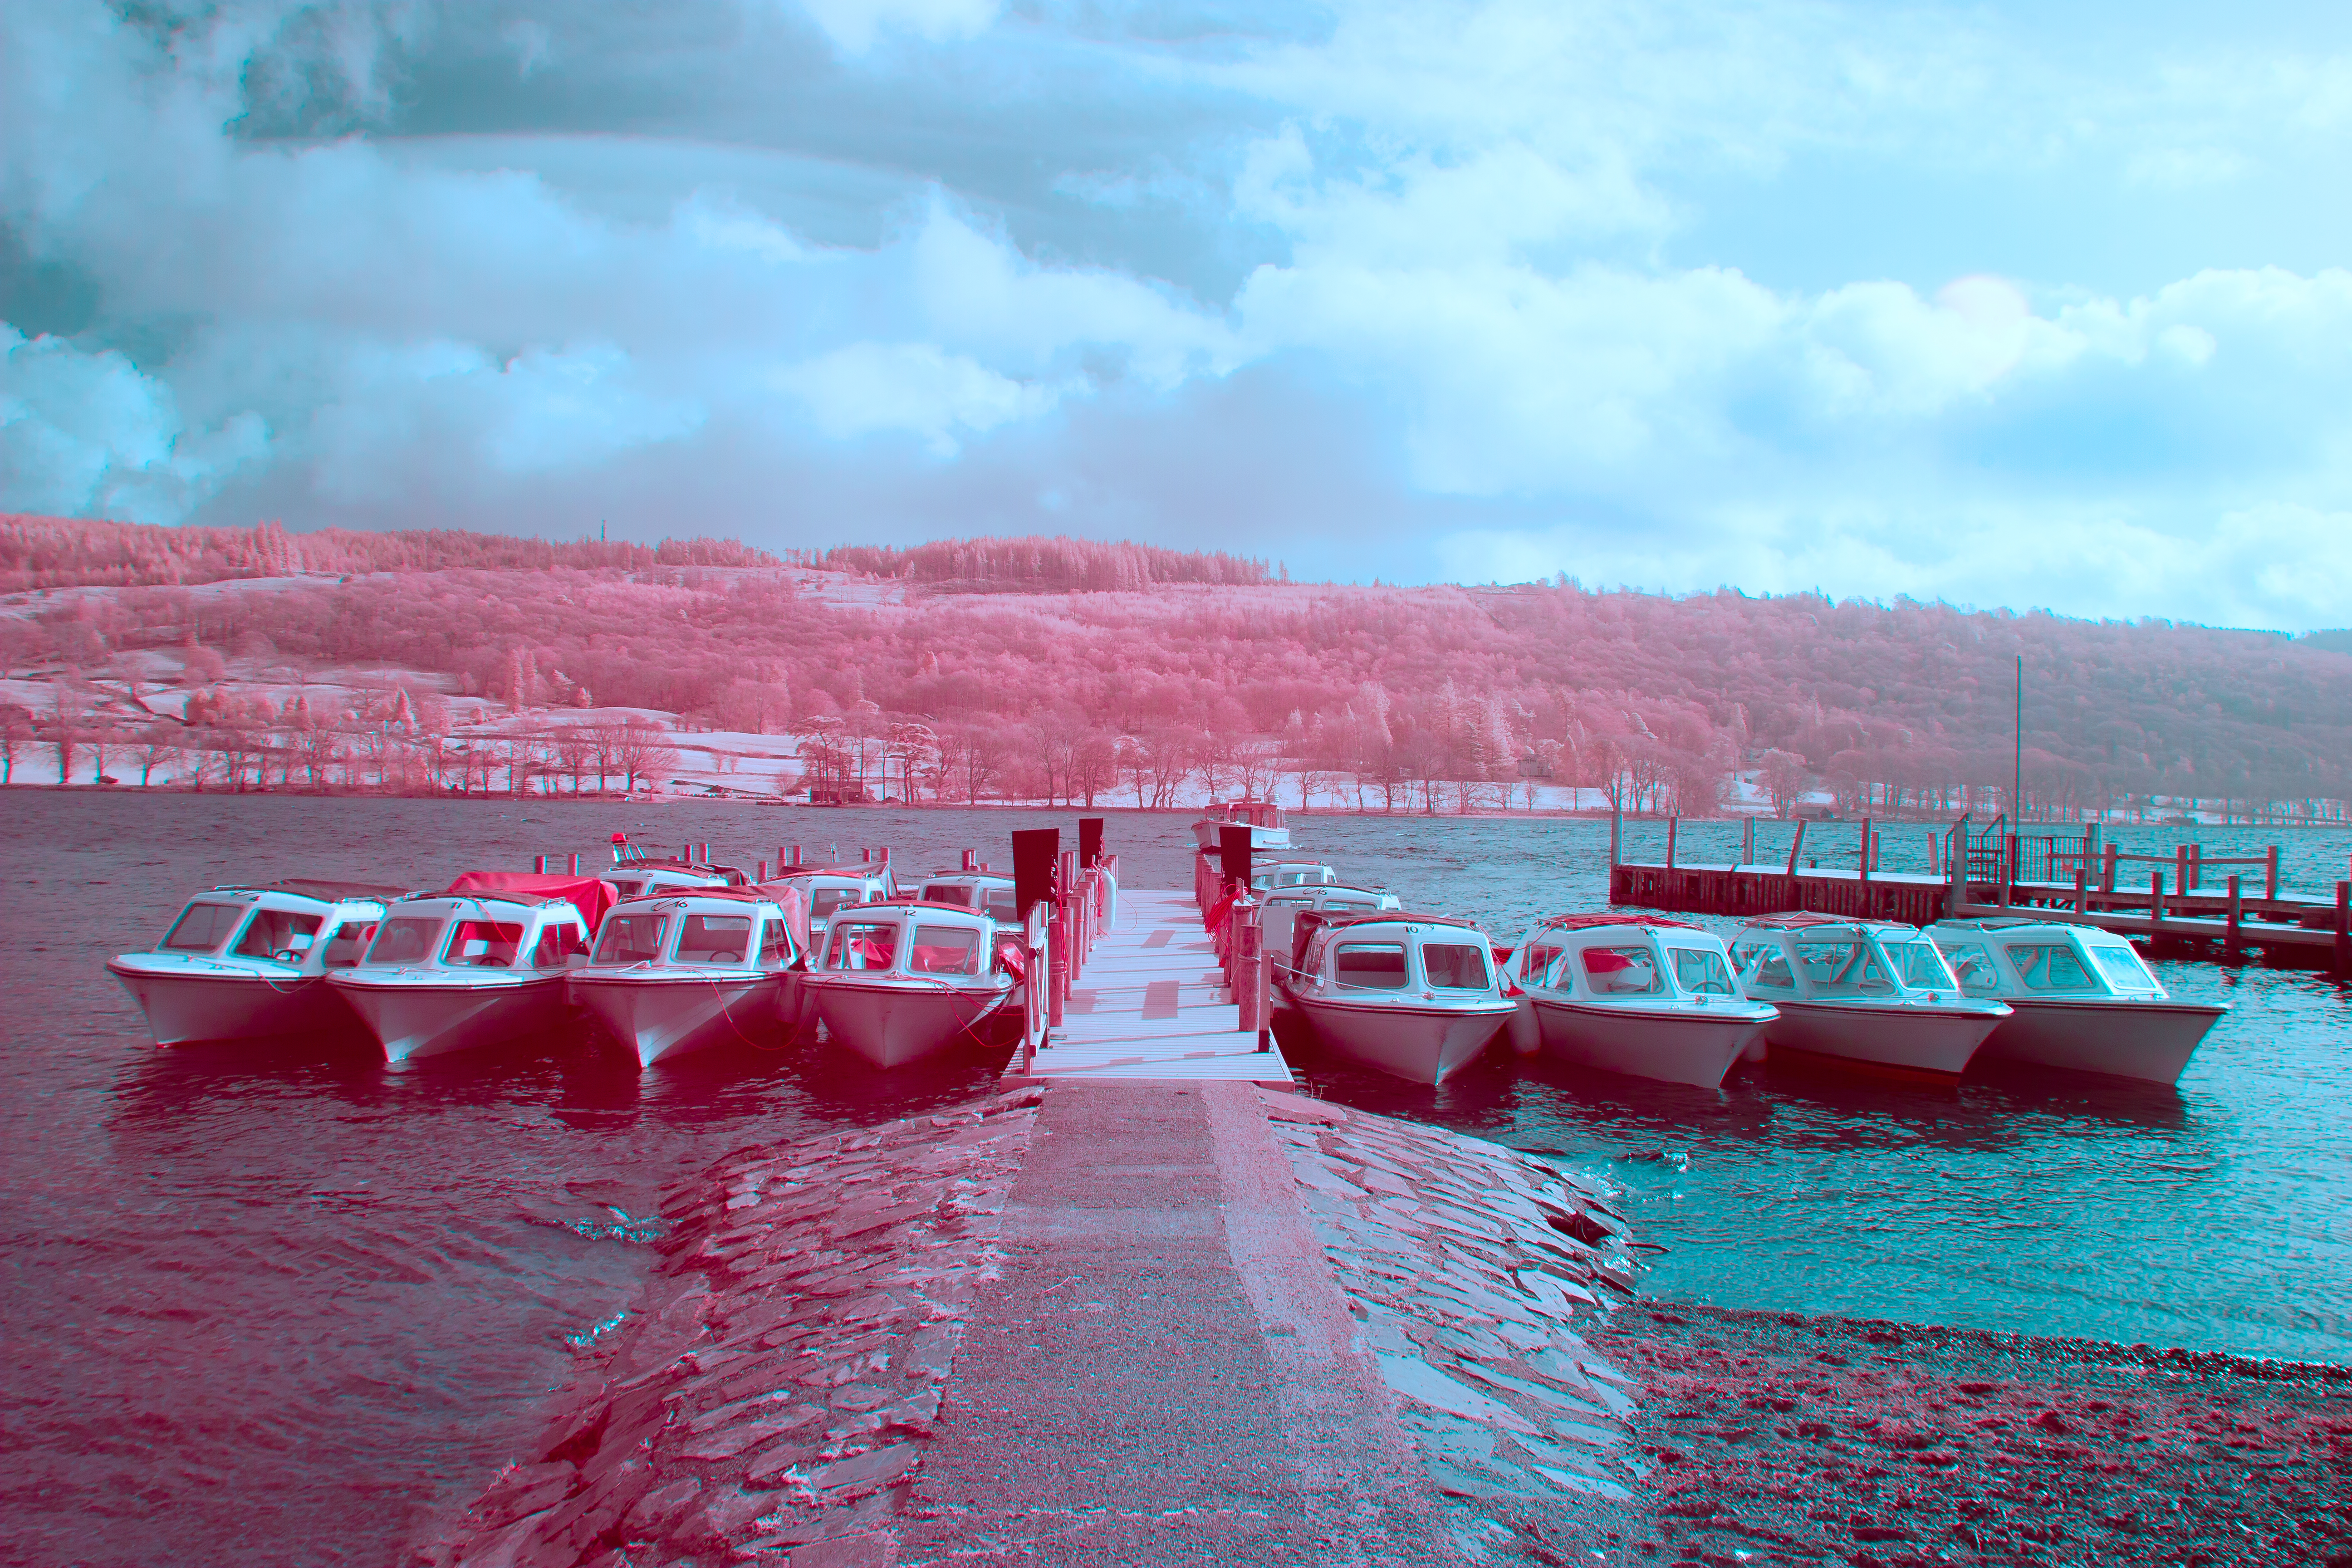
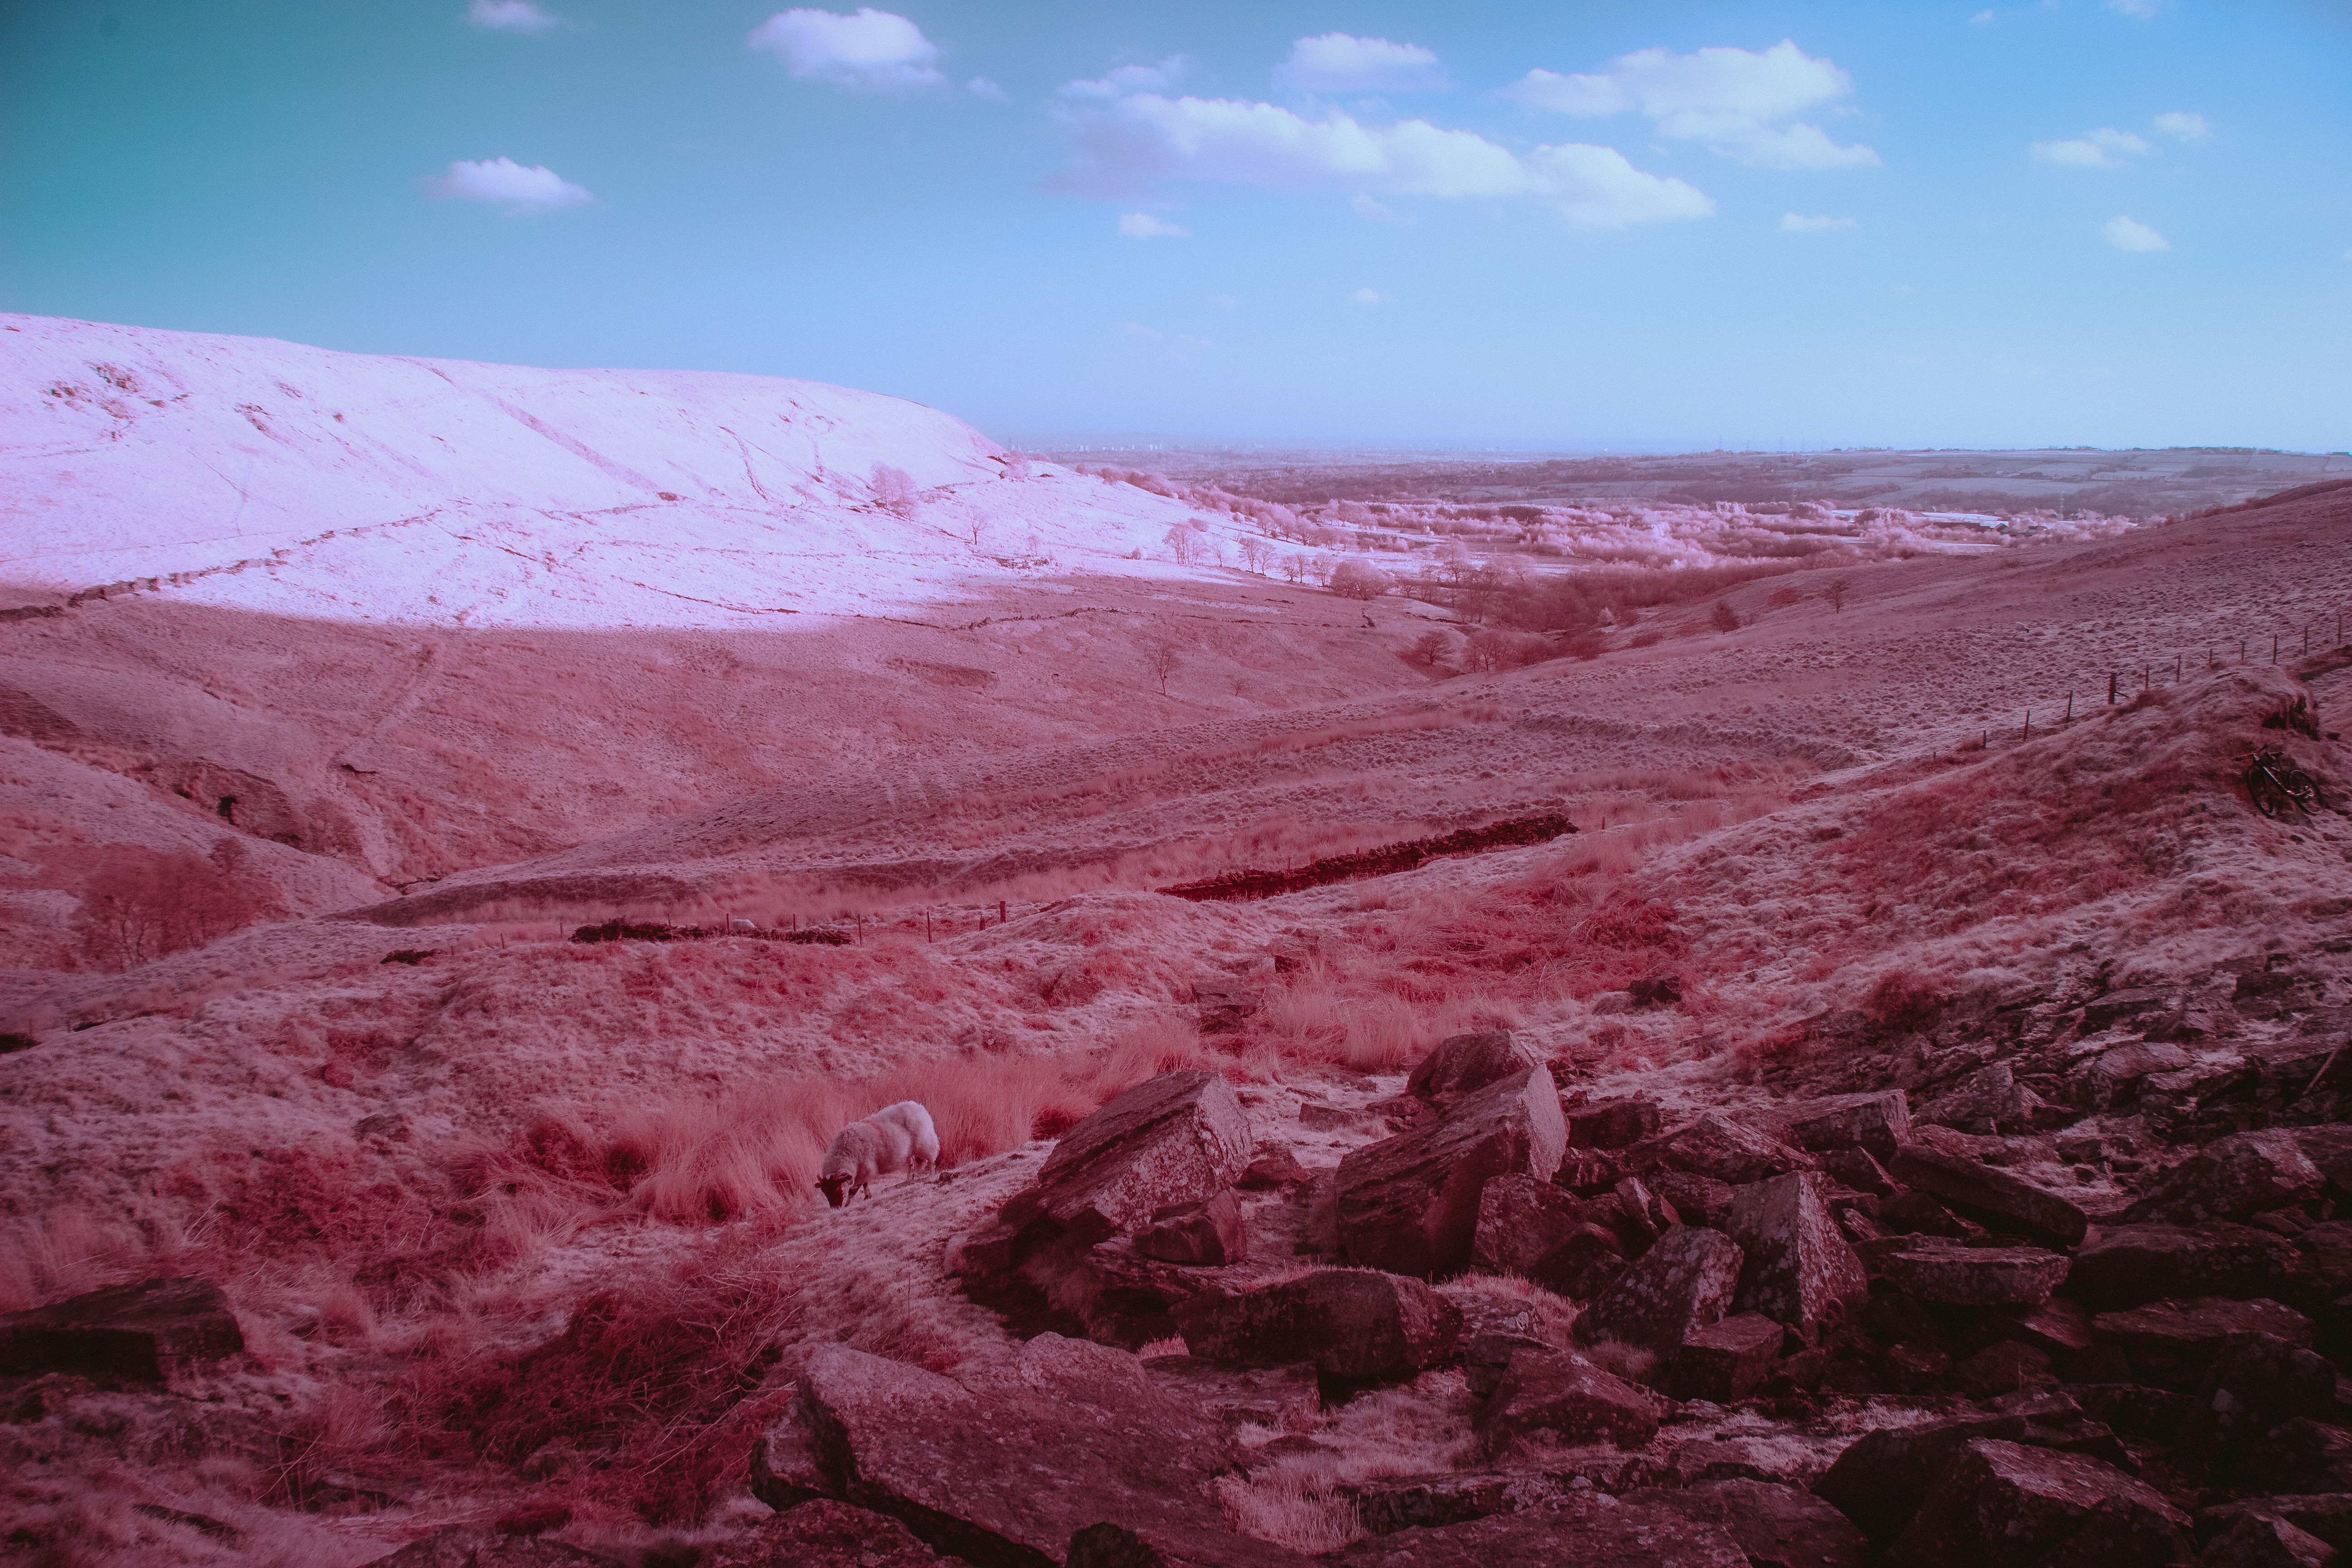
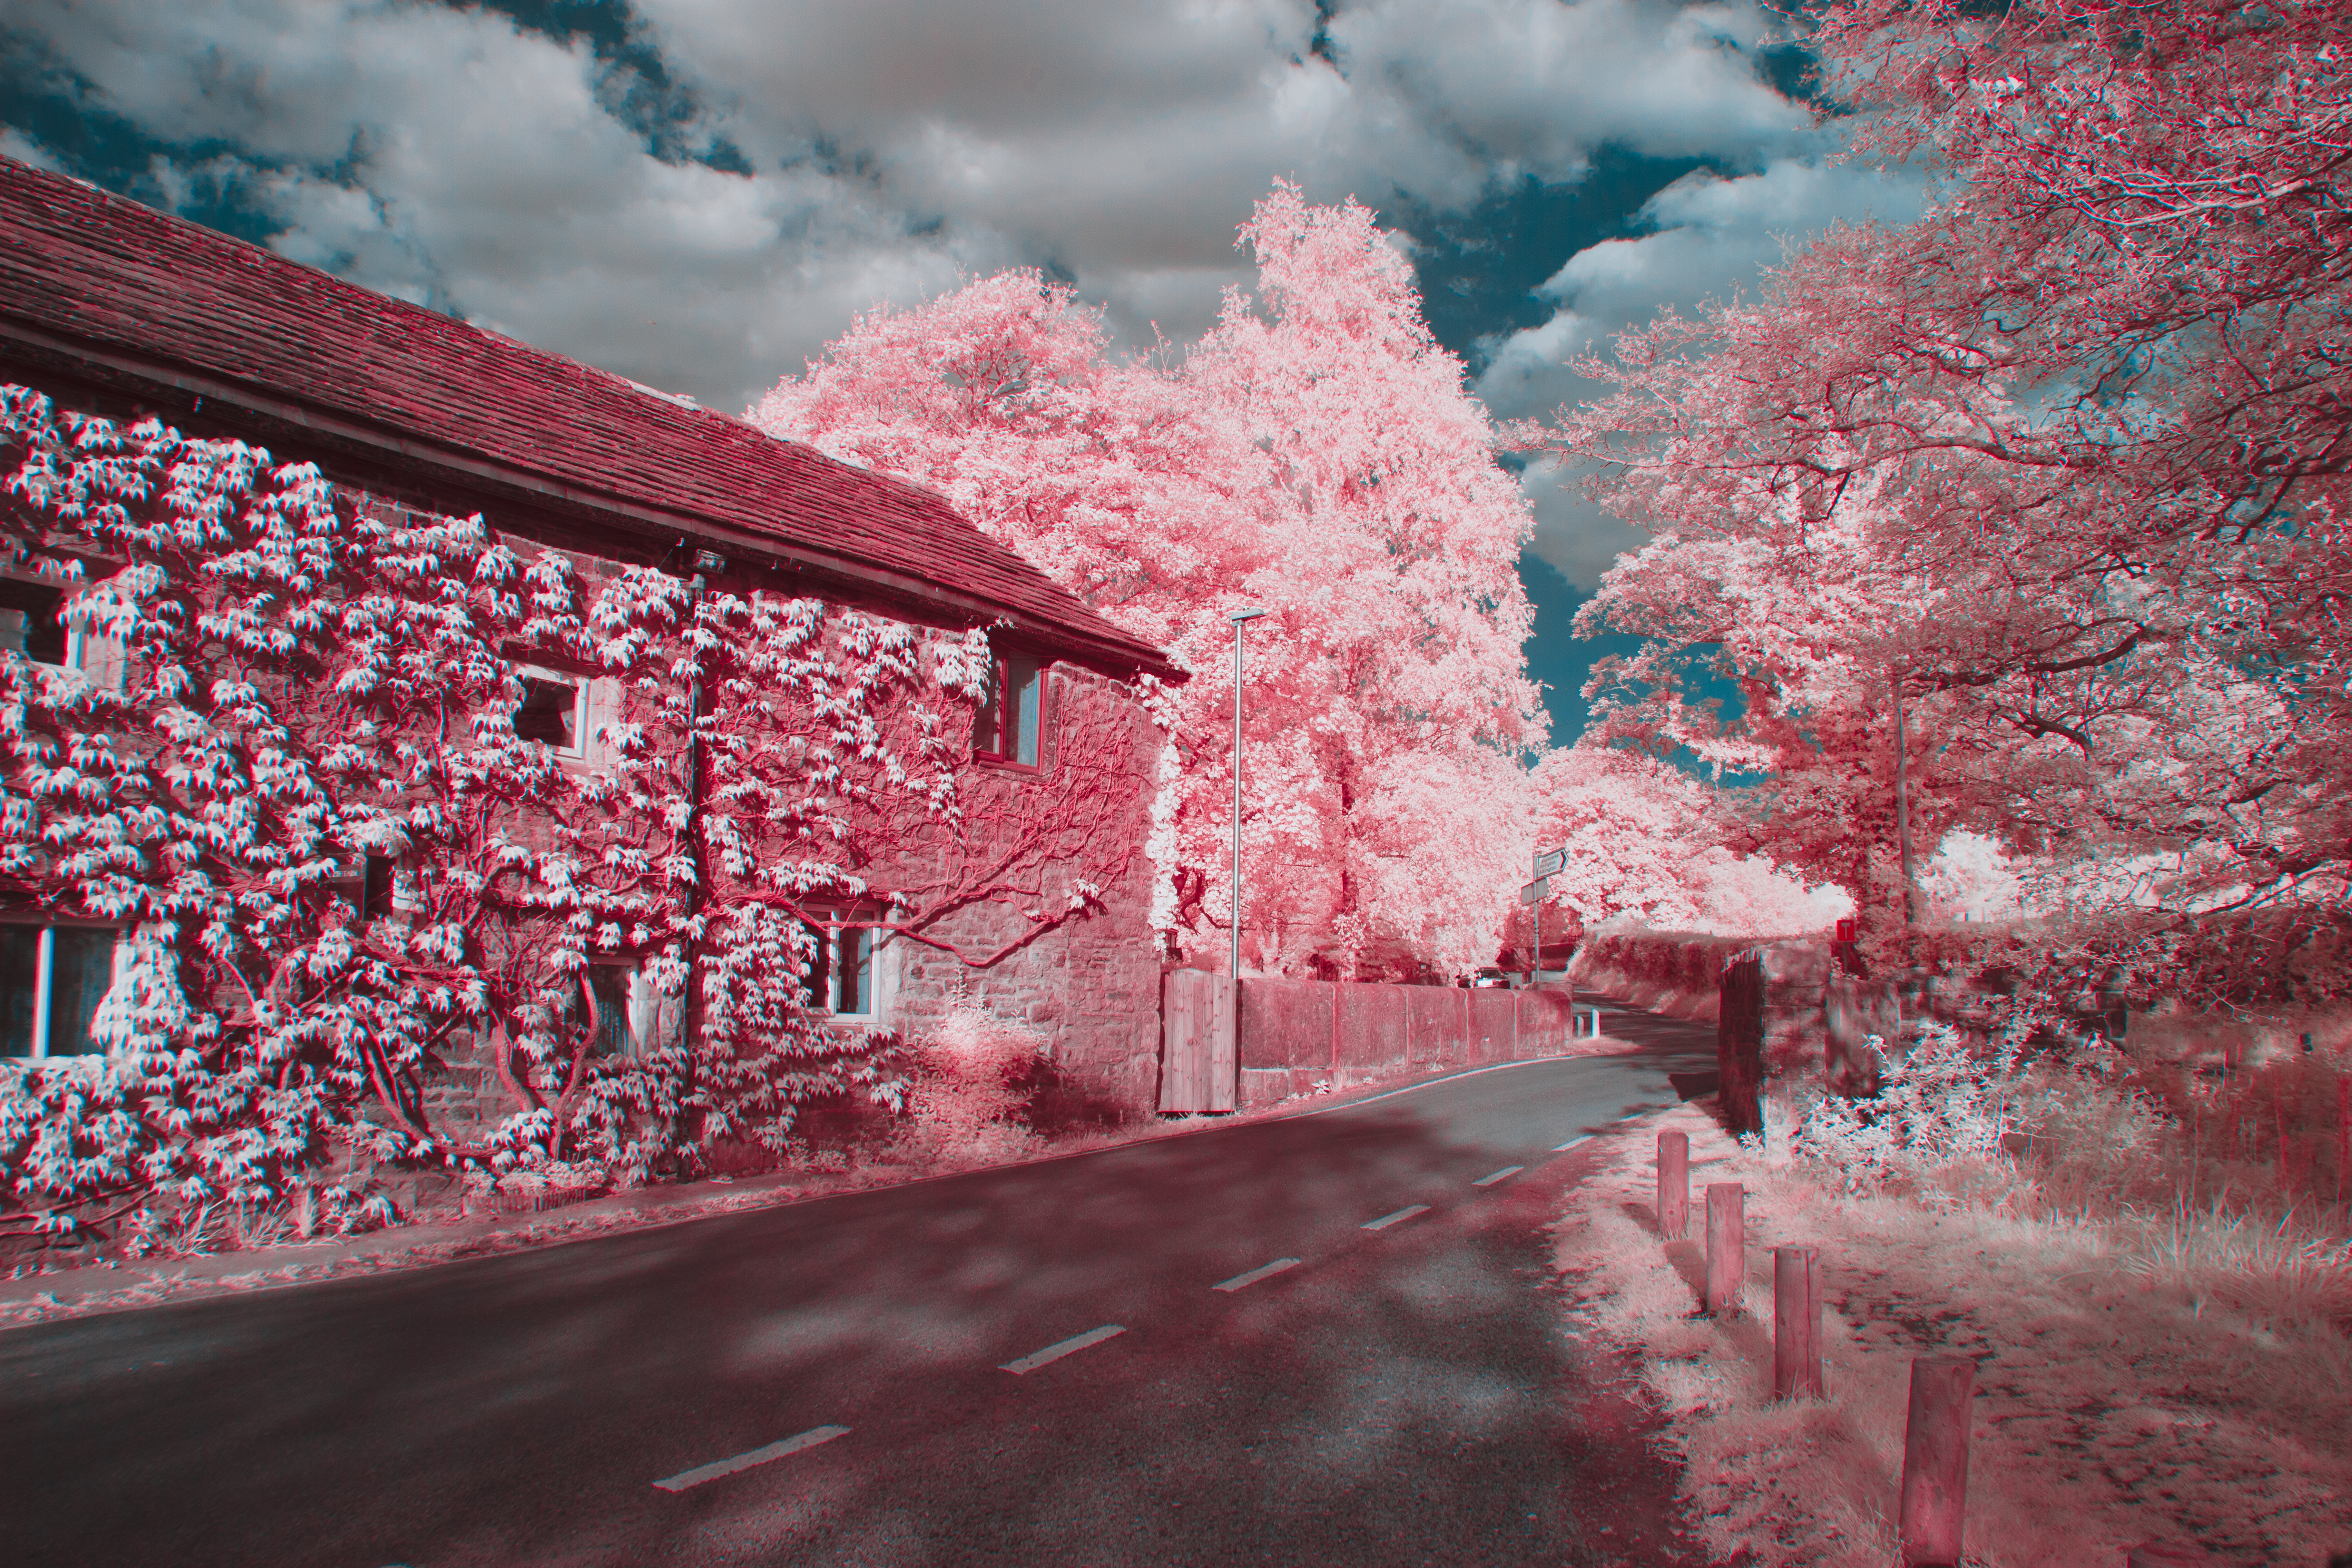
I found myself not liking the look. It was hard to get the true ‘aerochrome look’, vegatation was too pink, the skies the wrong colour. It was an interesting experiment, but for now, whether it be due to the wrong filter or any number of things, it wasn’t the look I was going for.
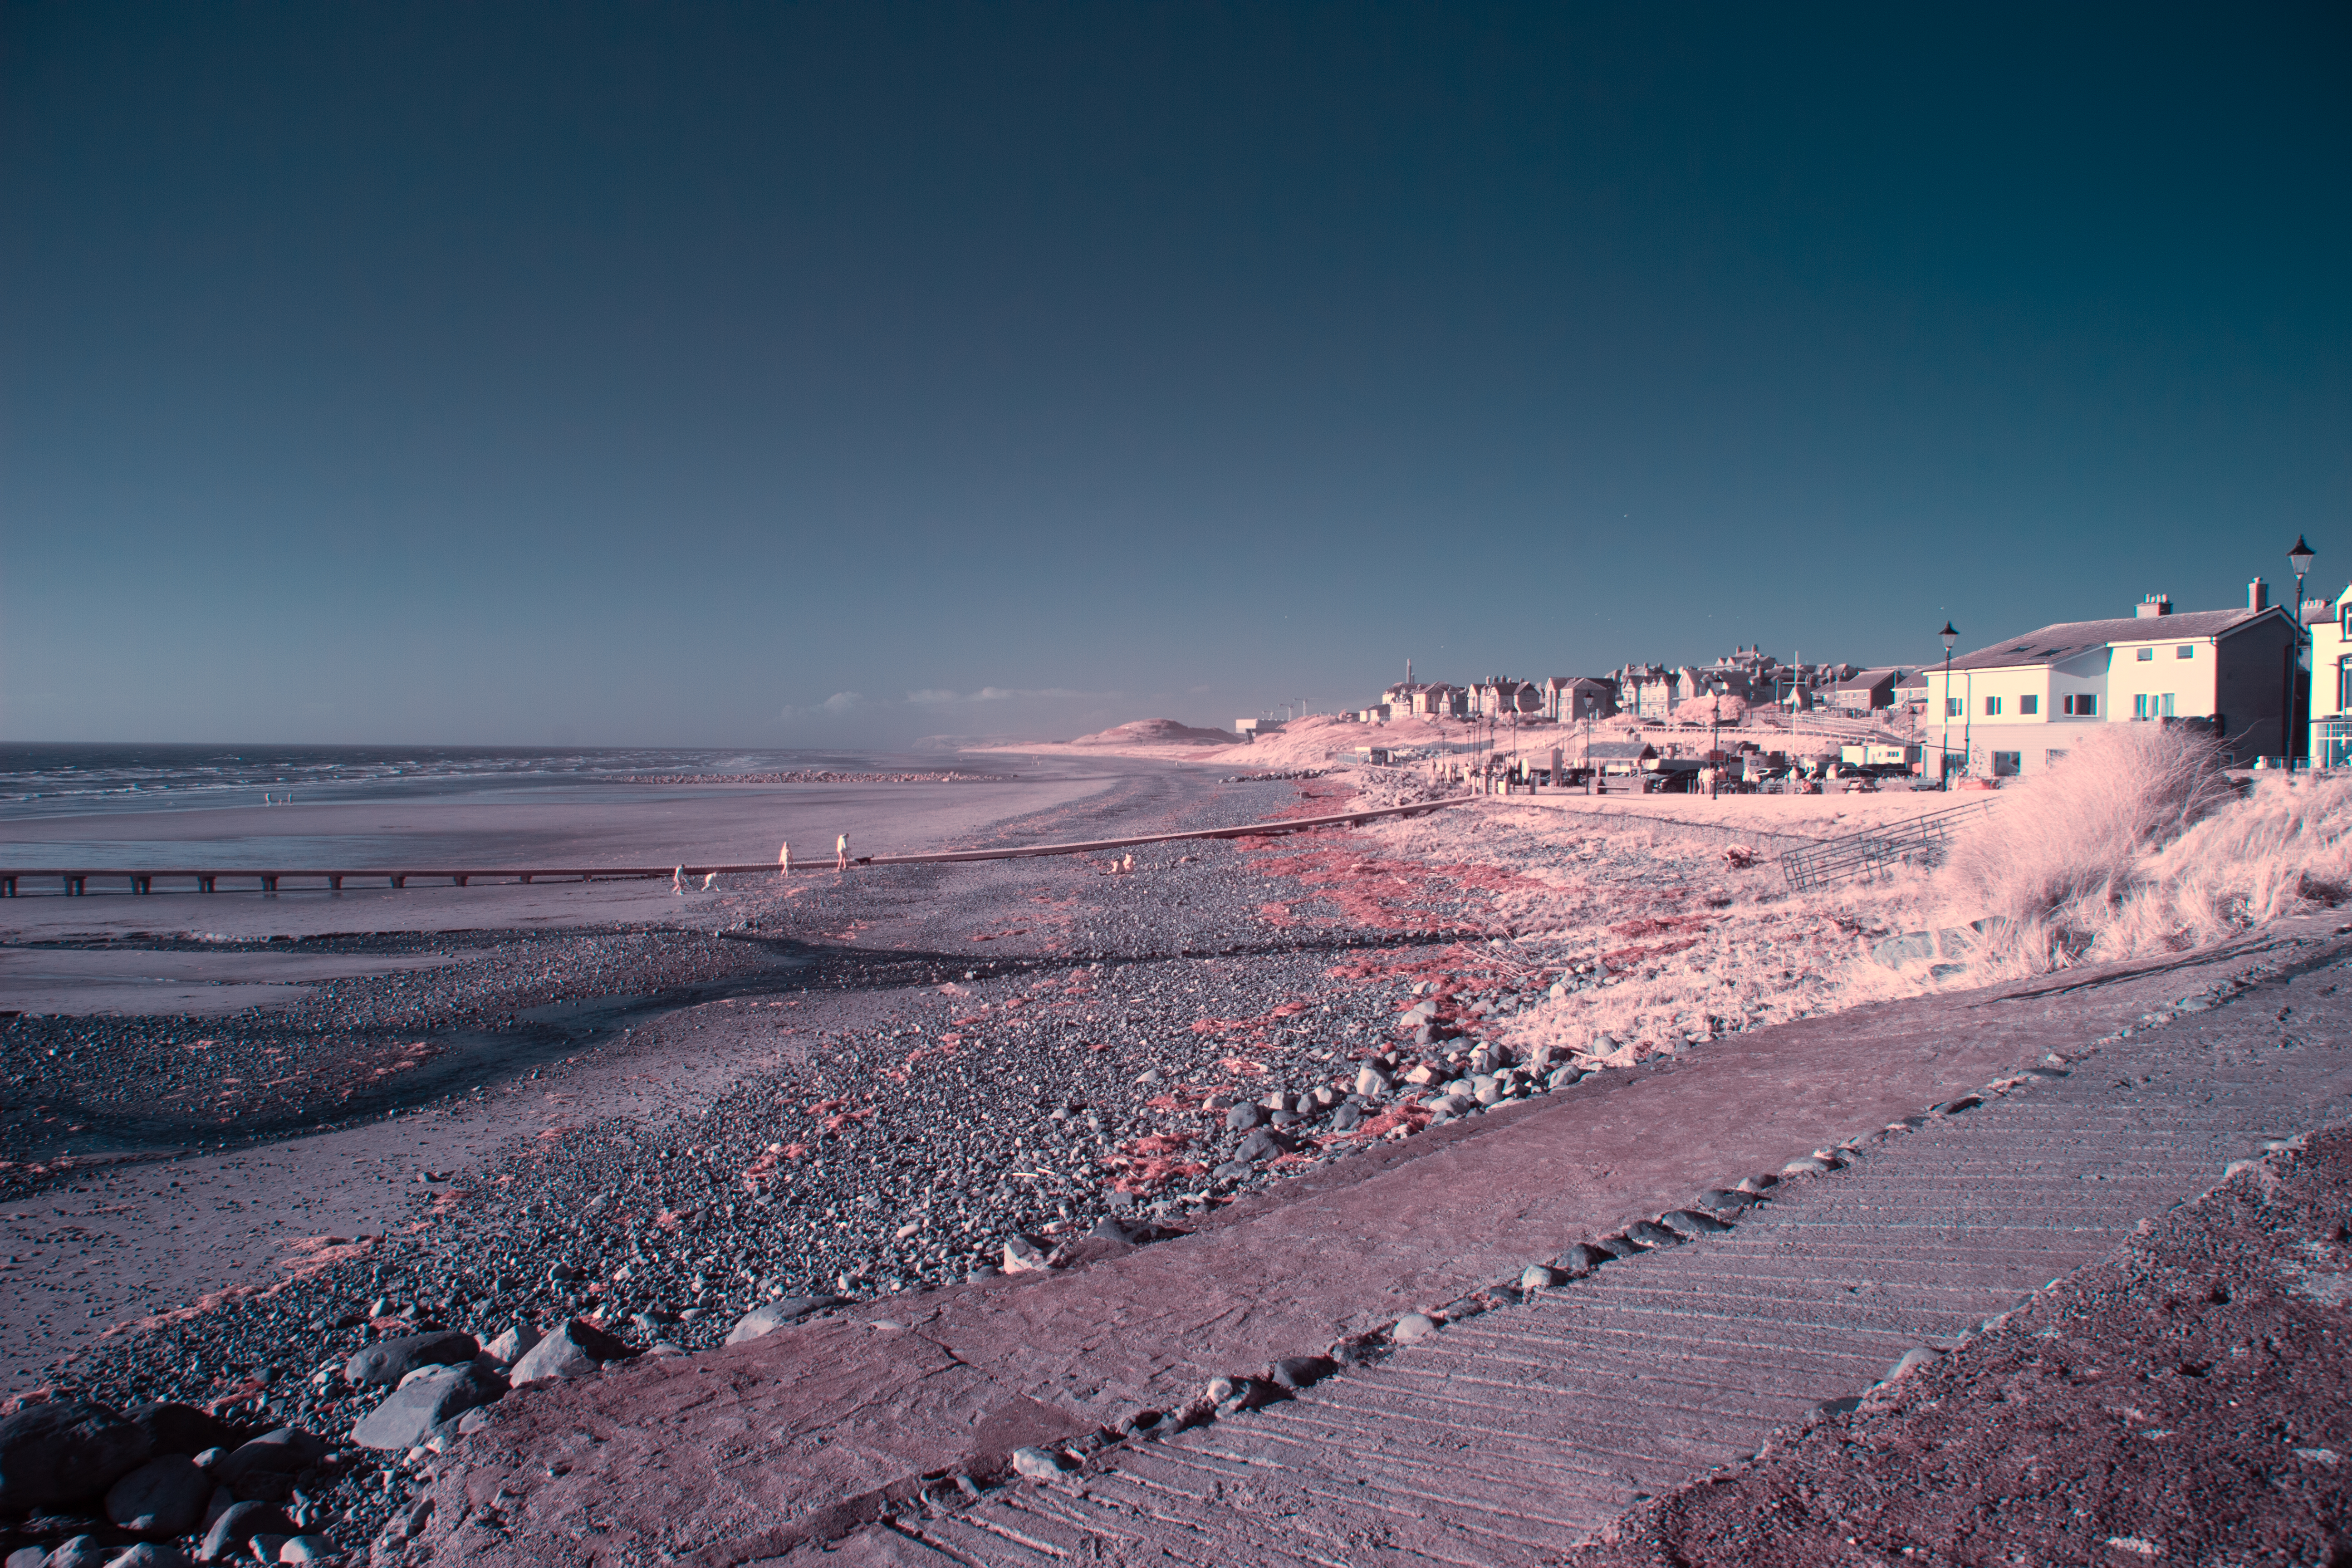
It was in the middle of component 2, which was almost entirely black and white, I converted one of the infrared photos to black and white. A little flat at first, I soon discovered how to shoot and edit the images to get the ultra high contrast, inky black skies, and pure white vegetation. This is when I fell in love with infrared photography.


The dense filter limits you to using the camera like a mirrorless one, composing and focusing through the screen only, a less than ideal limitation on a heavy DSLR without a rotating screen.
I find the process is now similar to film photography, in the field, while you can expose and compose through the screen, the pink wash of the frame means you don’t really have any idea of what the final image will look like, until you ‘develop’ the frame in Lightroom, by either converting it to a black and white profile, or doing the necessary steps for the ‘aerochrome look’ such as channel inversions in Photoshop.
Different Filters
It was only until writing this post that I decided to experiment with different filters, namely, weaker filters. I had an orange filter for black and white film photography, and decider to try that instead of the r72 filter. What this means, is it isn’t solely infrared light, but also the end of the colour spectrum. This post details how one can use weaker filters to properly emulate the ‘aerochrome look’ by inverting channels in a way similar to aerochrome’s channel mapping. What this means, is the extra visible light makes vegetation much more vibrant, meaning, even with a simple channel swap, one can achieve a much stronger look.
The only issue was, the orange filter was for my film camera and lenses, and therefore wouldn’t fit the larger filter thread of the canon 18-135 kit lens. I elected to buy a purpose built and tested filter, 550nm to be precise, but a 67mm 550nm filter from Kolari Vision would cost $115, and I was not about to pay that much. Instead, I found a Chinese optics manufacturer selling functionally the same thing for around £20. A week later, it arrived, and from my initial testing in less than ideal conditions, it does make a much more saturated image, and also allows one to use the viewfinder, as it simply looks like a yellow/orange filter, no more needing to use the DSLR in live view mode all the time.

What’s Next?
So, I achieved it. I got the ‘aerochrome look’ digitally. The weather hasn’t been permitting enough for full extensive testing, however I imagine I will continue to shoot and experiment with this effect for a while.
I would love to shoot it in the jungle of Malaysia in summer, allowing for a recreation of Mosse’s work in the Congo, however, due to the bulk of the camera, will most likely forgo it in favour for my even bigger and heavier Nikon F4s.
I also want to experiment with using the camera in infrared for film, more akin to the infrared scenes in Dune: Part Two, perhaps mixing the stark effect with a blob tracking effect in TouchDesigner.